Run Chrome extensions with Python Selenium on AWS Lambda
A detailed guide to use Selenium and Chrome with extensions on AWS Lambda
On this page
UPDATE 29 March 2022: As of this update, the instructions in this article may not work on AWS Lambda. Please refer to this discussion on GitHub for more details and alternative options.
I earlier wrote about how to run Chrome AWS Lambda using Python and Selenium webdriver, but running Chrome with extensions is a different ball game. So let’s unpack the problem first, and then we’ll get to the solution.
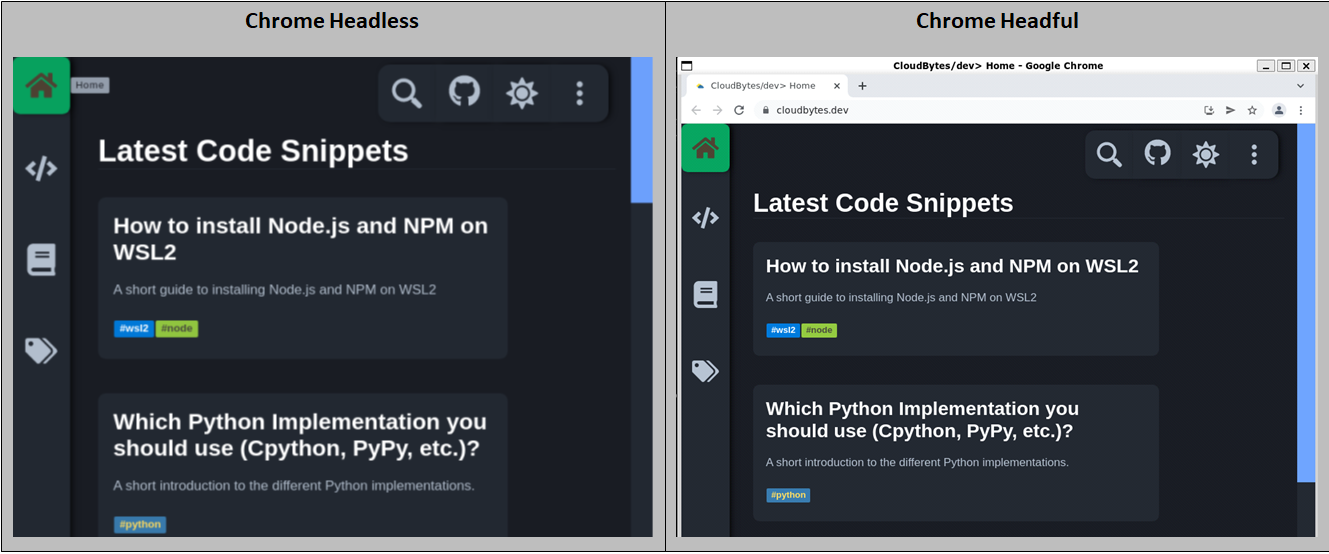
Chrome, when started in headless mode will start without browser UI, it is just a webpage viewport sans anything else.
You can take a screenshot by running the command
google-chrome --headless --disable-gpu --screenshot https://cloudbytes.dev
Why your Chrome extensions are not working using Selenium in headless mode?
As demonstrated above, because your Chrome is running in headless mode, it will not have any UI and thus no extensions are loaded. This is not a bug, it is a feature as explained here on chromium website.
So to be able to load extensions, you need to run Chrome in non-headless mode. Which is problematic considering AWS Lambda doesn’t have a display so you cannot really run Chrome GUI.
Or can you?
Yes you can, of course you can, I’ll show you how.
How to run Chrome with extensions in AWS Lambda
For this example, a reader asked to try to run GoFullPage extension in AWS Lambda. This extension relies on user-interaction thus presents a complex problem.
Let’s try and break this problem down.
- Extensions do not work in Chrome headless mode, thus you need to run Chrome in non-headless mode, i.e. with a display
- AWS Lambda doesn’t have a display, so you need a virtual display to run Chrome GUI. We will use
Xvfbwithpyvirtualdisplaywrapper to do this - The extension relies on user-interaction, but, Selenium cannot be used for these interactions since it restricts user interaction to DOM elements and doesn’t allow sending hotkeys to browser. Thus we will need to create a virtual keyboard to send keys to browser. In this case I chose to use
pyautogui - PyAutoGUI is a Python wrapper around the
Xliblibrary and relies on several linux packages that are NOT AVAILABLE on AWS Lambda’s default image that uses Amazon Linux 2 (derivative of CentOS) . So we need to use Debian based image on AWS Lambda to run this example. I chose to use Python Buster image.
Now with that out of the way, let’s get started.
Setting up the development environment
Step 1: You need VSCode, Docker Desktop, and WSL2 as the development environment. You can find instructions on how to setup WSL2 here
Step 2: Start the VScode editor
- Start the terminal and login to WSL2 by running
wsl - Make a new directory
mkdir selenium-awsand cd into itcd selenium-aws - Launch the VS Code editor by running
code .
Step 3: Reopen the folder in a devcontainer
- While in VScode, press
Ctrl + Shift + Pto open command palette - Choose
Reopen in Containerfrom the drop down menu - Then click on
Show All Definitions - Choose
Docker in Dockerfrom the drop down menu (Do not selectDocker from Docker) - Leave the default selections and choose OK in the next two dialogues
Next, install the following:
Step 4: Install AWS CLI
Step 5: Install SAM CLI
And finally, configure AWS CLI as per below
Step 6: Configure AWS & AWS CLI
Running Chrome Extensions using Selenium in AWS Lambda
Unlike a previous guide we’ll use a manual SAM templates to create a new Lambda app.
Your folder structure should look like below
.
├── __init__.py
├── events
│   └── event.json
├── src
│   ├── __init__.py
│   ├── app.py
│   ├── Dockerfile
│   ├── GoFullPage.crx
│   ├── install_chrome.sh
│   ├── install_driver.sh
│   └── requirements.txt
├── samconfig.toml
└── template.yaml
a) __init__.py
Both the __init__.py files should be empty
b) events/event.json
We will use a basic event structure that will trigger our lambda. The contents should be
{
    "body": "{\"message\": \"hello world\"}",
    "resource": "/{proxy+}",
    "path": "/path/to/resource",
    "httpMethod": "POST",
    "isBase64Encoded": false,
    "queryStringParameters": {
        "foo": "bar"
    },
    "pathParameters": {
        "proxy": "/path/to/resource"
    },
    "stageVariables": {
        "baz": "qux"
    },
    "headers": {
        "Accept": "text/html,application/xhtml+xml,application/xml;q=0.9,image/webp,*/*;q=0.8",
        "Accept-Encoding": "gzip, deflate, sdch",
        "Accept-Language": "en-US,en;q=0.8",
        "Cache-Control": "max-age=0",
        "CloudFront-Forwarded-Proto": "https",
        "CloudFront-Is-Desktop-Viewer": "true",
        "CloudFront-Is-Mobile-Viewer": "false",
        "CloudFront-Is-SmartTV-Viewer": "false",
        "CloudFront-Is-Tablet-Viewer": "false",
        "CloudFront-Viewer-Country": "US",
        "Host": "1234567890.execute-api.us-east-1.amazonaws.com",
        "Upgrade-Insecure-Requests": "1",
        "User-Agent": "Custom User Agent String",
        "Via": "1.1 08f323deadbeefa7af34d5feb414ce27.cloudfront.net (CloudFront)",
        "X-Amz-Cf-Id": "cDehVQoZnx43VYQb9j2-nvCh-9z396Uhbp027Y2JvkCPNLmGJHqlaA==",
        "X-Forwarded-For": "127.0.0.1, 127.0.0.2",
        "X-Forwarded-Port": "443",
        "X-Forwarded-Proto": "https"
    },
    "requestContext": {
        "accountId": "123456789012",
        "resourceId": "123456",
        "stage": "prod",
        "requestId": "c6af9ac6-7b61-11e6-9a41-93e8deadbeef",
        "requestTime": "09/Apr/2015:12:34:56 +0000",
        "requestTimeEpoch": 1428582896000,
        "identity": {
            "cognitoIdentityPoolId": null,
            "accountId": null,
            "cognitoIdentityId": null,
            "caller": null,
            "accessKey": null,
            "sourceIp": "127.0.0.1",
            "cognitoAuthenticationType": null,
            "cognitoAuthenticationProvider": null,
            "userArn": null,
            "userAgent": "Custom User Agent String",
            "user": null
        },
        "path": "/prod/path/to/resource",
        "resourcePath": "/{proxy+}",
        "httpMethod": "POST",
        "apiId": "1234567890",
        "protocol": "HTTP/1.1"
    }
}
c) template.yaml
AWSTemplateFormatVersion: "2010-09-09"
Transform: AWS::Serverless-2016-10-31
Description: >
  python3.8
  Selenium on Lambda
Globals:
  Function:
    Timeout: 120

Resources:
  SeleniumFunction:
    Type: AWS::Serverless::Function
    Properties:
      PackageType: Image
      Events:
        Selenium:
          Type: Api
          Properties:
            Path: /twitter
            Method: get
    Metadata:
      Dockerfile: Dockerfile
      DockerContext: ./src
      DockerTag: python3.9-Selenium

Outputs:
  SeleniumApi:
    Description: "API Gateway endpoint URL for Prod stage for Selenium function"
    Value: !Sub "https://${ServerlessRestApi}.execute-api.${AWS::Region}.amazonaws.com/Prod/selenium/"
  SeleniumFunction:
    Description: "Selenium Lambda Function ARN"
    Value: !GetAtt Selenium.Arn
d) src/Dockerfile
Our Dockerfile needs to do the following
- Start from the python:buster image
- Install AWS Lambda dependencies to run the Lambda function on custom image
- Install Lambda Runtime Interface Client to implement Lambda Runtime API
- Copy the extension, app.py and requirements.txt to the Docker image
- Install the python dependencies
- Install Chrome Browser to auto install Chromium dependencies
- Install latest Chromium Browser
- Install latest Chromedriver
- Install Xvfb and dependencies
- Configure Lambda Runtime API to execute the Lambda function
# Define function directory
ARG FUNCTION_DIR="/function"
ARG RUNTIME_VERSION="3.9"


FROM ubuntu:latest as base-image

RUN apt-get update && DEBIAN_FRONTEND=noninteractive TZ=Etc/UTC
RUN apt-get install -y g++ make cmake unzip libcurl4-openssl-dev
RUN apt-get install -y python3 python3-pip
RUN apt-get install xvfb python3-tk python3-dev -y
RUN apt-get install curl wget -y

ARG FUNCTION_DIR
# Create function directory
RUN mkdir -p ${FUNCTION_DIR}
# Copy function code


RUN pip install \
    --target ${FUNCTION_DIR} \
    awslambdaric

# Include global arg in this stage of the build
ARG FUNCTION_DIR
# Set working directory to function root directory
WORKDIR ${FUNCTION_DIR}

# Copy setup & other temporary files
COPY requirements.txt /tmp/
#COPY GoFullPage.crx /opt/
RUN pip install --upgrade pip -q
RUN pip install -r /tmp/requirements.txt -q
COPY install_chrome.sh /tmp/
RUN /bin/bash /tmp/install_chrome.sh
COPY install_driver.sh /tmp/
RUN /bin/bash /tmp/install_driver.sh
COPY install_chromium.sh /tmp/
RUN /bin/bash /tmp/install_chromium.sh
COPY app.py ${FUNCTION_DIR}

COPY GoFullPage.crx /opt/
RUN ls -al /opt/chrome/stable/

ENTRYPOINT [ "python3", "-m", "awslambdaric" ]
CMD [ "app.handler" ]
e) src/GoFullPage.crx
Go Full Page is the chrome extension that we will use in this demo.
There are many ways to download Chrome extensions, in this case I recommend running the below command
curl -L "https://clients2.google.com/service/update2/crx?response=redirect&\
os=win&arch=x64&os_arch=x86_64&nacl_arch=x86-64&prod=chromiumcrx&\
prodchannel=beta&prodversion=79.0.3945.53&lang=ru&acceptformat=crx3\
&x=id%3Dfdpohaocaechififmbbbbbknoalclacl%26installsource%3Dondemand%26uc" -o GoFullPage.crx
f) src/install_chrome.sh
Next we install Chrome browser
#!/bin/bash

apt-get update && apt-get upgrade -y

echo "Download the latest Chrome .deb file..."
wget https://dl.google.com/linux/direct/google-chrome-stable_current_amd64.deb -q

echo "Install Google Chrome..."
dpkg -i google-chrome-stable_current_amd64.deb

echo "Fix dependencies..."
apt-get --fix-broken install -y
Make sure you make this file executable by running the following command
chmod +x src/install_chrome.shg) src/install_chromium.sh
Now with dependencies installed we can install Chromium browser
#!/bin/bash

echo "Downloading Chromium"
mkdir -p "/opt/chrome/stable"
curl -Lo "/opt/chrome/stable/chrome-linux.zip" \
    "https://www.googleapis.com/download/storage/v1/b/chromium-browser-snapshots/\
    o/Linux_x64%2F954502%2Fchrome-linux.zip?generation=1640815524872726&alt=media"
unzip -q "/opt/chrome/stable/chrome-linux.zip" -d "/opt/chrome/stable/"
ls -al /opt/chrome/stable/chrome-linux
mv /opt/chrome/stable/chrome-linux/* /opt/chrome/stable/
rm -rf /opt/chrome/stable/chrome-linux /opt/chrome/stable/chrome-linux.zip
Make this file executable by running
chmod +x src/install_chromium.shh) src/install_driver.sh
Now we install a compatible chrome driver. The below script
- Gets the version of Chrome installed,
- Then gets the latest version of the chromedriver available,
- Compares if the versions are the same
- Downloads the latest chromedriver if the version match
- If not, it will exit with an error
If you have used the install_chrome.sh script to install Chrome, the versions should match.
echo "Getting Chrome version..."
chrome_version=($(google-chrome-stable --version))
version=${chrome_version[2]}
chrome_version=${version%.*}
echo "Chrome version: ${chrome_version}"

echo "Getting latest chromedriver version"
chromedriver_version_full=$(curl "https://chromedriver.storage.googleapis.com/LATEST_RELEASE")
version=${chromedriver_version_full}
chromedriver_version=${version%.*}
echo "Chromedriver version: ${chromedriver_version}"

if [ "${chrome_version}" == "$chromedriver_version" ]; then
    echo "Compatible Chromedriver is available..."
    echo "Proceeding with installation..."
else
    echo "Compabible Chromedriver not available...exiting"
    exit 1
fi

echo "Downloading latest Chromedriver..."
mkdir -p "/opt/chromedriver/stable/"

 curl "https://www.googleapis.com/download/storage/v1/b/chromium-browser-snapshots/\
      o/Linux_x64%2F954502%2Fchromedriver_linux64.zip?generation=1640815530134396&alt=media" \
  -H 'authority: www.googleapis.com' \
  -H 'sec-ch-ua: " Not A;Brand";v="99", "Chromium";v="96", "Google Chrome";v="96"' \
  -H 'sec-ch-ua-mobile: ?0' \
  -H 'sec-ch-ua-platform: "Windows"' \
  -H 'dnt: 1' \
  -H 'upgrade-insecure-requests: 1' \
  -H "user-agent: Mozilla/5.0 (Windows NT 10.0; Win64; x64) AppleWebKit/537.36 (KHTML, like Gecko)\
       Chrome/96.0.4664.110 Safari/537.36" \
  -H "accept: text/html,application/xhtml+xml,application/xml;q=0.9,image/avif,image/webp,image/\
      apng,*/*;q=0.8,application/signed-exchange;v=b3;q=0.9" \
  -H "x-client-data: CLO1yQEIhrbJAQiktskBCMG2yQEIqZ3KAQjRoMoBCMCXywEI6vLLAQie+csBCNf8ywEI5oTMAQi1\
      hcwBCMuJzAEI0IvMAQisjswBCJqPzAEI0o/MAQjakMwBCMmSzAEIoZPMAQjHk8wBCIqUzAEY5KDLAQ==" \
  -H 'sec-fetch-site: none' \
  -H 'sec-fetch-mode: navigate' \
  -H 'sec-fetch-user: ?1' \
  -H 'sec-fetch-dest: document' \
  -H 'accept-language: en-GB,en-US;q=0.9,en;q=0.8,ms;q=0.7' \
  --compressed > /opt/chromedriver/stable/chromedriver_linux64.zip


unzip -q "/opt/chromedriver/stable/chromedriver_linux64.zip" \
    -d "/opt/chromedriver/stable/"

mv /opt/chromedriver/stable/chromedriver_linux64/chromedriver /opt/chromedriver/stable/chromedriver

chmod +x "/opt/chromedriver/stable/chromedriver"
rm -rf "/opt/chromedriver/stable/chromedriver_linux64.zip"

echo "Chrome & Chromedriver installed"
Again, make sure you make this file executable by running the following command
chmod +x src/install_driver.shi) src/app.py
The app.py file needs model the following user behavior
- Open the browser with the extension installed
- Open
www.example.com - Close extension welcome page
- Start screenshot capture by pressing
Shift + Alt + P - Navigate to the screenshot page
- Download the screenshot to the default downloads directory by clicking on download button
- Close the browser
- Upload the screenshot(s) to S3
We achive this by the following code.
# src/app.py
import time
import glob
import os
from selenium import webdriver
from selenium.webdriver.chrome.service import Service
from selenium.webdriver.common.keys import Keys
from selenium.webdriver.common.by import By
from selenium.webdriver.chrome.options import Options
from pyvirtualdisplay import Display
#from pyvirtualdisplay.smartdisplay import SmartDisplay


def handler(event=None, context=None):
    display = Display(visible=False, extra_args=[':25'], size=(2560, 1440), backend="xvfb")
    display.start()
    print('Started Display')
    #Pyautogui requires os.environ["Display"] variable to be set.
    import pyautogui

    chrome_options = Options()
    # Headless environment starts without browser UI so no extensions
    #chrome_options.add_argument("--headless")
    chrome_options.binary_location = "/opt/chrome/stable/chrome"
    chrome_options.add_argument("--no-sandbox")
    chrome_options.add_argument("--disable-dev-shm-usage")
    chrome_options.add_argument("--disable-gpu")
    chrome_options.add_argument("--disable-dev-tools")
    #chrome_options.add_argument("--no-zygote") #This will not load the extension
    #chrome_options.add_argument("--single-process") #Single process will break the app
    chrome_options.add_argument("window-size=2560x1440")
    chrome_options.add_argument("--remote-debugging-port=9222")
    chrome_options.add_argument("--user-data-dir=/tmp/chrome-user-data")
    chrome_options.add_extension("/opt/GoFullPage.crx")
    download_directory = {"download.default_directory": "/tmp/"}
    chrome_options.add_experimental_option("prefs", download_directory)
    webdriver_service = Service("/opt/chromedriver/stable/chromedriver")
    browser = webdriver.Chrome(service=webdriver_service, options=chrome_options)

    browser.get("https://example.com")
    # Open Extension options
    print("Open Extension options...")
    browser.switch_to.window(browser.window_handles[1])
    browser.get("chrome-extension://fdpohaocaechififmbbbbbknoalclacl/options.html")

    # Provide Download Permission
    print("Provide Download Permission...")
    browser.find_element(By.ID, "perm-toggle").click()
    browser.find_element(By.NAME, "downloads").click()
    browser.switch_to.active_element
    time.sleep(1)
    pyautogui.press("tab")
    time.sleep(1)
    pyautogui.press("enter")

    # Close options
    print("Close options...")
    print(len(browser.window_handles)) #Expected 2
    browser.close()
    print(len(browser.window_handles)) #Expected 1
    time.sleep(1)
    # Take screenshot
    print("Take screenshot...")
    browser.switch_to.window(browser.window_handles[0])
    pyautogui.hotkey("shift", "alt", "p")
    time.sleep(5)
    print(len(browser.window_handles)) #Expected 2
    browser.switch_to.window(browser.window_handles[1])
    time.sleep(1)
    browser.find_element(By.ID, "btn-download").click()


    time.sleep(5)
    browser.quit()

    # importing earlier conflicts with selenium actions
    import boto3
    s3 = boto3.client("s3")
    BUCKET_NAME = "cloudbytes.dev" # replace with your bucket name

    for image in glob.iglob("/tmp/*.png"):
        s3.upload_file(image, BUCKET_NAME, os.path.basename(image))

    return {"status":"success"}
Make sure you replace the BUCKET_NAME in the code with your bucket name.
j) src/requirements.txt
This will contain the python dependencies required for the Lambda function
selenium
pyvirtualdisplay
pillow
keyboard
pyautogui
python-xlib
boto3
Build & test Lambda app to run Chrome with extension
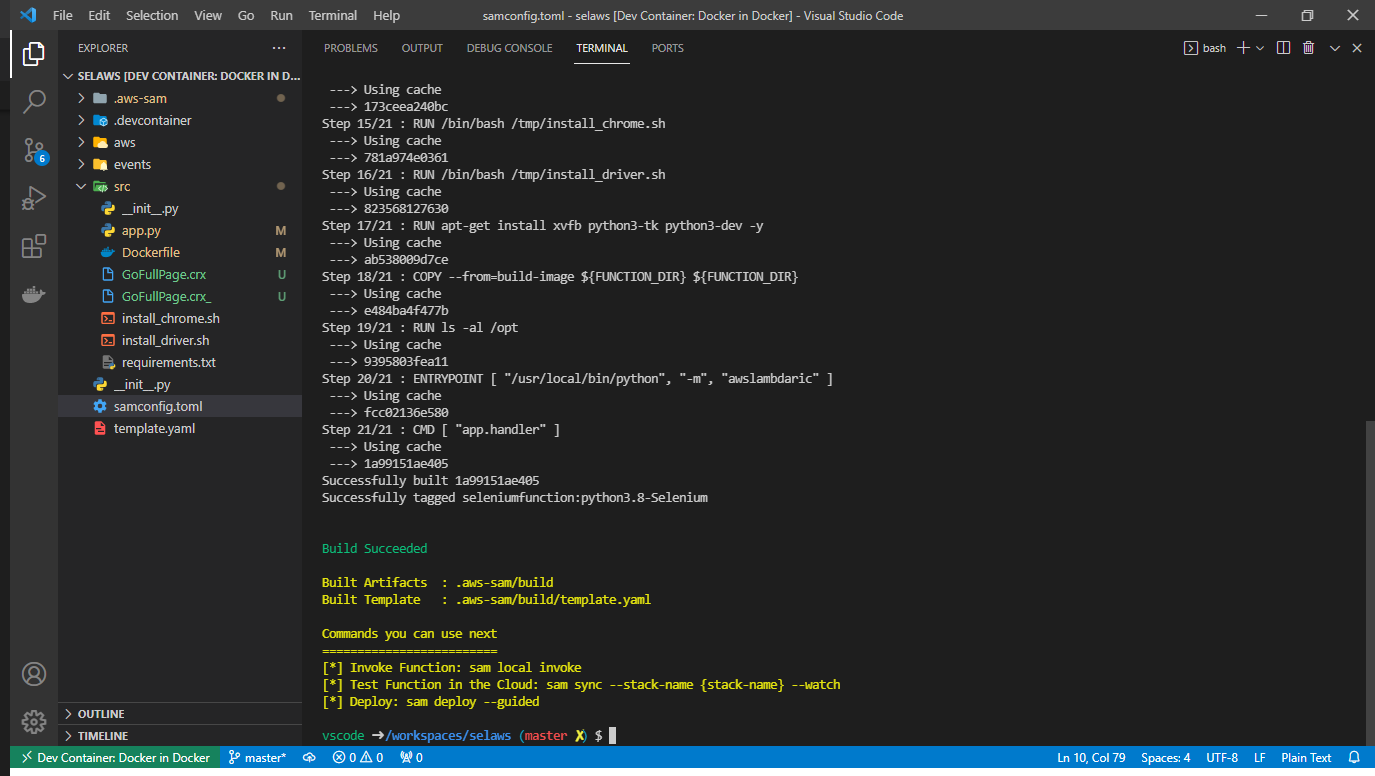
To build, just run the following command
sam buildThis will result in a message similar to this (the build process typically takes a few minutes given your internet speed)
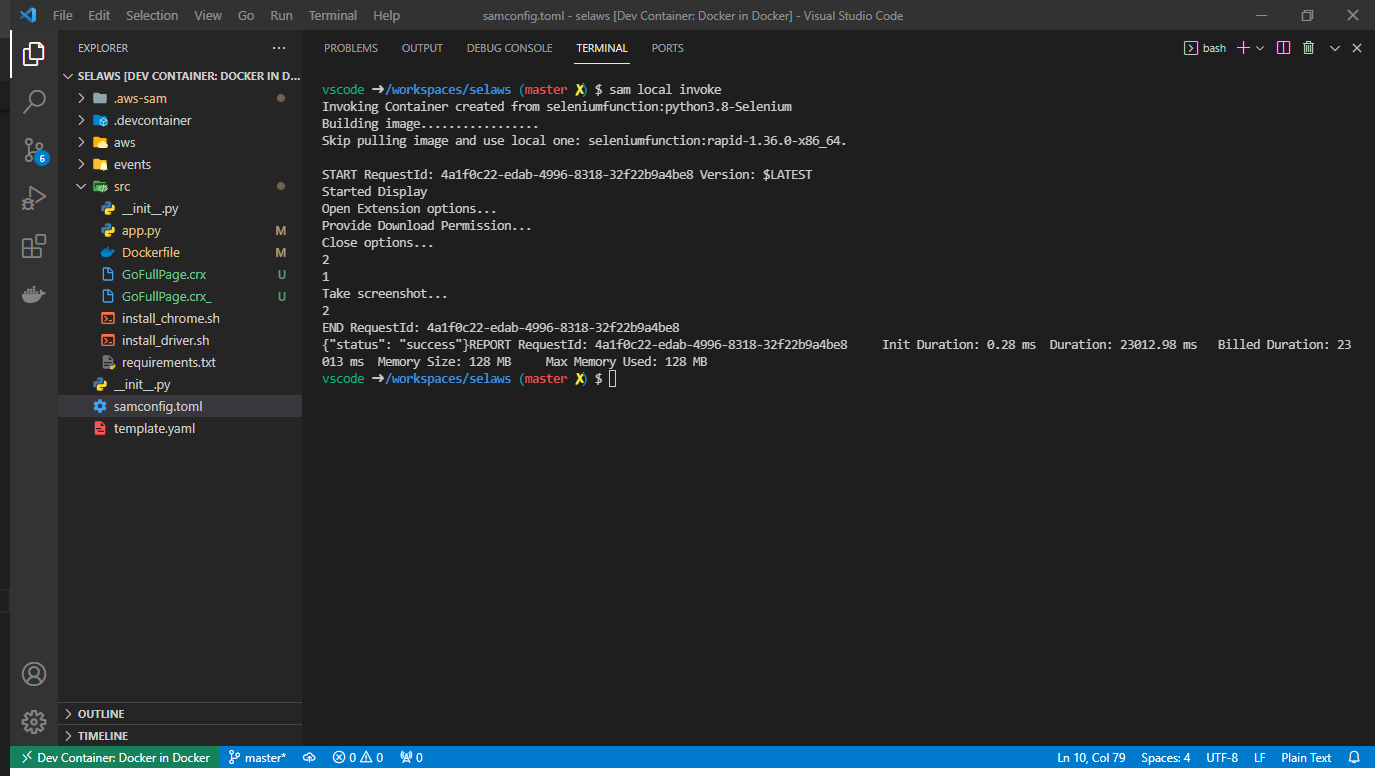
Finally, to test the Lambda function, run the following command
sam local invokeThis will run the Lambda function locally and display the following output
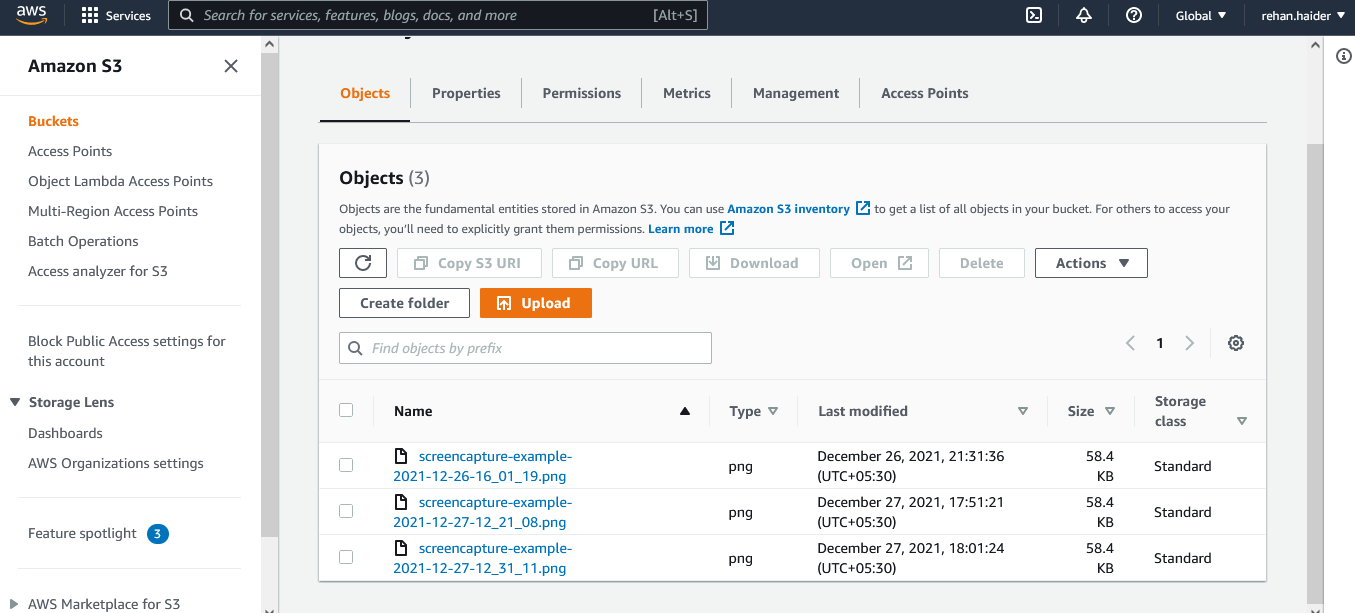
Check the results
Go to your AWS console and navigate to the S3 bucket that you chose in the step (i) above.
You should see the screenshot(s) that you uploaded to S3 for each test execution.
Deploying to AWS Lambda
Deploying to AWS Lambda is as simple as running the below
sam deploy --guidedThis will launch a guided deployment process, you can use the following:
Configuring SAM deploy
======================
Looking for config file [samconfig.toml] : Found
Reading default arguments : Success
Setting default arguments for 'sam deploy'
=========================================
Stack Name [selaws]:
AWS Region [us-east-1]:
#Shows you resources changes to be deployed and require a 'Y' to initiate deploy
Confirm changes before deploy [y/N]:
#SAM needs permission to be able to create roles to connect to the resources in your template
Allow SAM CLI IAM role creation [Y/n]:
#Preserves the state of previously provisioned resources when an operation fails
Disable rollback [y/N]:
SeleniumFunction may not have authorization defined, Is this okay? [y/N]: y
Save arguments to configuration file [Y/n]:
SAM configuration file [samconfig.toml]:
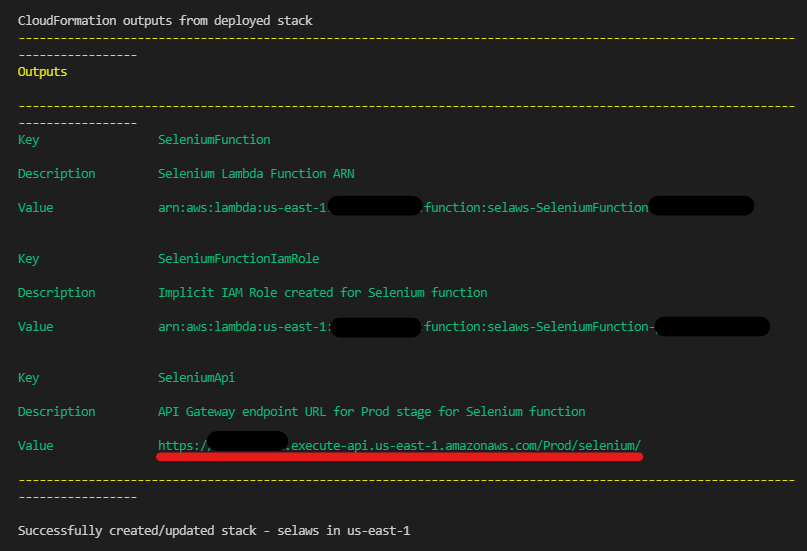
SAM configuration environment [default]: Now you can run the Lambda app from the AWS console. Alternatively, you can also run the Lambda function by calling the API we created by using the following command
curl https://<api-id>.execute-api.us-east-1.amazonaws.com/Prod/selenium/You can get the API ID from deployment output of sam deploy as shown below:
Final Code
The above code is available on GitHub in this repository.
Need help?
Start a discussion on GitHub if you’ve got questions or improvements. Open discussions →