How to use Git and GitHub to contributed to Open Source Projects
If you're a budding developer Git and GitHub is going to be your best friend and your worst enemy that you cannot get away from. So, it's better to learn what it does and how it does.
Jokes aside, Git is a kind of source-code version control tool, i.e. if multiple people are working on the same application and developing different modules, Git / or any other version control system is used to ensure the parallel work does not conflict with each other.
Git Vs GitHub
Git specifically is an opensource tool developed by Linus Torvalds (the same guy to made Linux Kernel) around 2005, and is the de-facto version control tool that is used nowadays.
GitHub on the other hand uses this open source tool to host code repositories that can be used by people like you and me.
Git can also be connected with mutliple other respository hosting providers such as GitHub, GitLab, Bitbucket etc.
Install & Configure Git
Git can be downloaded and installed from the Git-SCM website. Register on GitHub with your email and note your username, e.g. my username on GitHub is rehanhaider
Then set your username in Git on your system by running
git config --global user.name "<your username>"
Next, set your commit email ID, this should match your GitHub ID.
git config --global user.email "email@example.com"
Finally, follow this guide on GitHub to cache your credentials so you don't have to enter your username / password everytime you use GitHub.
Git / GitHub basics
There is a lot of things you can do with Git, but we'll keep the focus on actions that you will encounter on a day to day basis.
One key concept to keep in mind is that your system keeps a "local" copy of a repository that needs to be synced with the "origin" i.e. GitHub server.
A typical Git workflow looks like below.
Where the "main" branch is usually not changed directly and each node is a "commit". Developers create a branch, make their changes, and then create a "pull request" or PR to ask the owner of main branch to review their changes and merge the code.
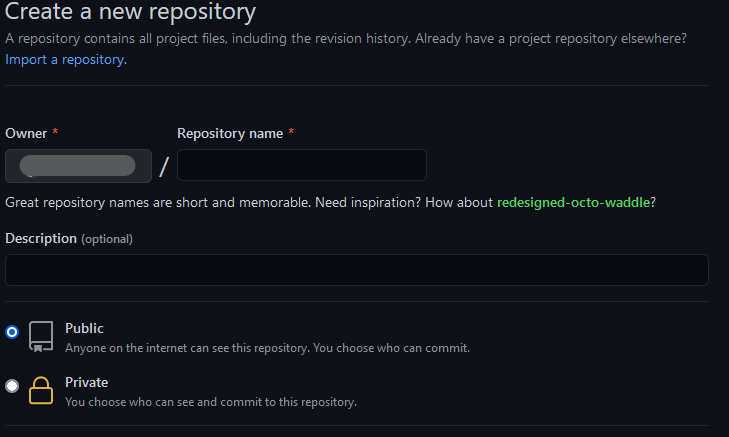
Create a new repository
You either create a new repository on GitHub directly by clicking on the ➕ sign on top right, and choosing new repository.  .
.
Fork a repository
Most of the times, you don't want to start from scratch and instead build on top of already existing and opensource tools / software. E.g. if you want to build your own copy of CloudBytes, you can do so by "forking" the publicly available CloudBytes source code on GitHub.
To fork a repository, go to CloudBytes source code on GitHub or any other repo that you want to fork and click on the fork button on top right.
Clone a repository
Now a copy or fork of the repository has been created on GitHub, but you need to create a local copy for you to be able to make changes. This is called cloning, e.g. to clone the forked copy of CloudBytes repo
git clone https://github.com/<your-username>/CloudBytes.dev.git
Create a Branch
To create a new branch and checkout (switch over) to it, run the below
git checkout -b <branch-name>
Stage the changes
Save your changes in the staging area by running the below command
git add .
This will start tracking any new file that you may have created and save all the changes you have made.
Commit the changes
So far your changes are only saved in staging area, i.e. they haven't been added to your branch. To add your changes to the branch run
git commit -m "Describe your changes"
Push the Changes
Now your changes are committed but they are only available on your local system and not on GitHub. This will require you to push your code to GitHub (or origin)
If you're pushing your changes in the current branch for the fist time, then run
git push --set-upstream origin <branch-name>
After the first time, you can just run git push to push your changes to GitHub.
Pull Requests
Now your code is merged into your own branch, but not in the "upstream" branch that is the main branch. To do that you need to create a pull request with your changes. That can be done on GitHub by visiting your forked repo, clicking on the branches, find your branch in the list and click on New Pull request.

Merging the changes
Now the owner of the repository will get a notification that there is an open PR. They can review the changes and decide to merge it into the main branch or send it back for further changes.
