How to install multiple instances of Ubuntu in WSL2
A guide to installing multiple fresh instances of Ubuntu in WSL2
On this page
Last Updated: 2026-04-13
Windows Subsystem for Linux 2 (WSL2) is in its second iteration that uses an actual Linux Kernel, an upgrade of the previous kernel emulator which was called Windows Subsystem for Linux (WSL).
It’s a great tool developers who need to Linux for developing and testings their apps. And sometimes, you just want more than one instance of Ubuntu on your machine.
Installing multiple instances of Ubuntu in WSL2
If you are running windows 10 version 2004 or higher (Build 19041 and above), you can install the latest version of Ubuntu in WSL by running the the below command.
Step 1: Install the latest version of Ubuntu in WSL2
wsl --installThis will take care of all the steps required, i.e.
- It will enable the optional compoenents required on windows (e.g. Windows Virtualisation Platform, etc.)
- Enable Windows Subsystem for Linux 2 (WSL2)
- Update the Linux kernel to the latest version
- Install the default Linux distribution, i.e. latest Ubuntu
Once installed, just run wsl to open the WSL2 shell, on the first login you will be asked to choose username and password.
Step 2: Download the Ubuntu WSL tarball
You can download the Ubuntu WSL tarball from the Ubuntu WSL2 Image for 24.04 and save it to your local machine.
You can use your Windows Terminal / Powershell to do so, first run the following command to remove curl alias which the mighty intelligent 🤡 Powershell developers have built in
Remove-Item alias:curlThen, run the following command to download the Ubuntu WSL tarball. Copy paste the entire code block below into your Windows Terminal and run it
curl (("https://cloud-images.ubuntu.com",
"wsl/releases/noble/current",
"ubuntu-noble-wsl-amd64-wsl.rootfs.tar.gz") -join "/") `
--output ubuntu-24.04-wsl-root-tar.gz
If prompted with a warning, press “Paste anyway” and then press enter to execute. This will download the Ubuntu WSL image tarball to you current directory.

you need a specific version of Ubuntu, you can find the list of available versions here. Just replace the version number in the above command with the version you want to download.
Step 3: Install the second instance of Ubuntu in WSL2
Just the below command and
- Replace the
<Distribution Name>with the name you want to give, e.g.ubuntu-2, - Replace
<Installation Folder>with the folder where you want to install the second instance of Ubuntu - and finally replace
<Ubuntu Tarball path>with the path of the Ubuntu WSL2 image tarball you downloaded earlier.
wsl --import <Distribution Name> <Installation Folder> <Ubuntu WSL2 Image Tarball path>
After that run, wsl -l -v to see the list of distributions installed.
Step 4: Login to the second instance of Ubuntu in WSL2
To login you need to run:
wsl -d <Distribution Name>You might see an error, ignore it and continue.
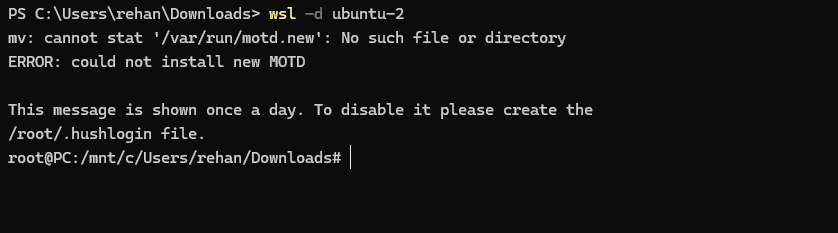
Step 5: Setup user accounts
Notice in the above image that the logged in user is a root account. So let’s setup a normal user account.
First, while logged in to the second instance of Ubuntu in WSL2 as root, run the below command, replace <USERNAME> with the username of your choice:
NEW_USER=<USERNAME>Then, run the following command to create the user account and set the password:
useradd -m -G sudo -s /bin/bash "$NEW_USER"
passwd "$NEW_USER"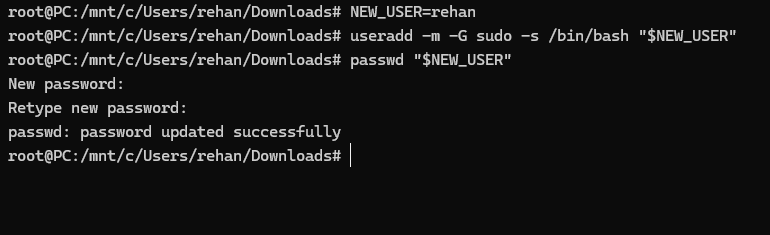
Step 6: Configure default user
Next, we need to configure Ubuntu to log in as your new user by default instead of root.
To do so, run the below command: paste the entire block of code below into your teminal and press enter.
tee /etc/wsl.conf <<_EOF
[user]
default=${NEW_USER}
_EOF
Step 7: Login as the new user
First, exit the WSL by running logout, then shutfown the second Ubuntu by running
wsl --terminate <Distribution Name>Finally, login to the second instance of Ubuntu again:
wsl -d <Distribution Name>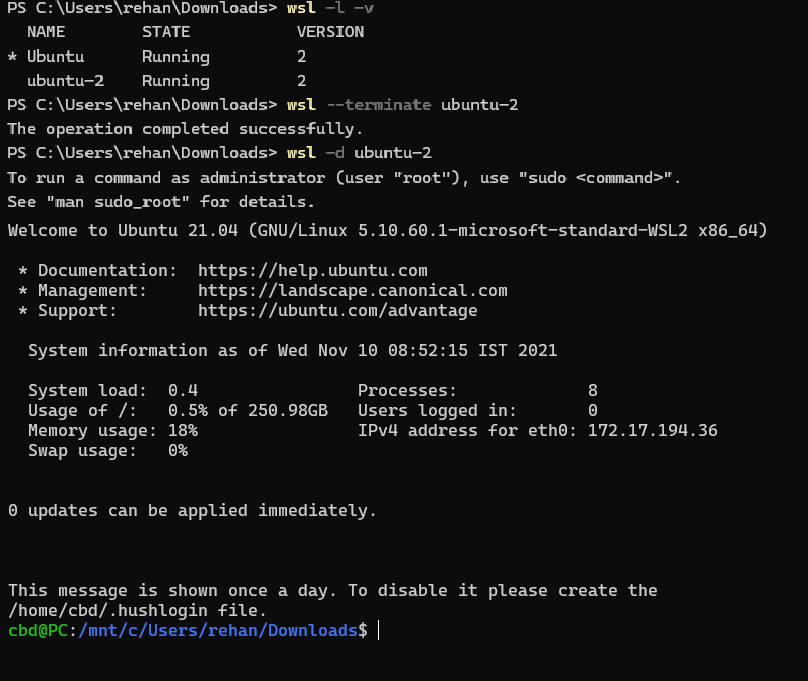
You should now be logged in as the new user.
Need help?
Start a discussion on GitHub if you’ve got questions or improvements. Open discussions →