Convert a Pelican Website to PWA using Workbox
There has always been 2 types of apps since internet was invented
- Apps that ran on the desktop (Windows / Linux / Mac) that was developed using a variety of programming languages (C/C++, Java, etc.)
- Apps that ran in browsers, typically built with HTML with
With smartphones entering the fray, this quickly started to change with native Android and iOS apps being made using typically different technologies, e.g. Java/Kotlin for Android and Objective-C/Swift for iOS.
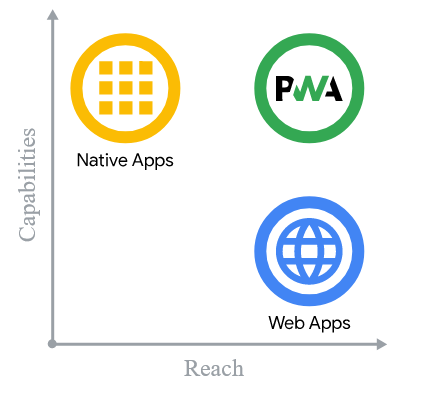
While native smartphone apps were able to leverage the smartphone features such as camera, GPS, and other sensors. Web apps were limited in this regard.
This also meant most app developers had 3 codebases, one for Android, one for iOS, and one for web. Several attempts has been made to simplify this and make a "cross platform development framework", such as React Native, Ionic, Xamarin, etc.
Except the recently launched Flutter, all of them faced the same problem, apps were trans-compiled into native app format resulting in performance loss due to an abstraction layer.
Introducing the PWA
The concept of PWA has been around since the release of iPhone, but the current incarnation was only built in around 2015 by engineers at Google working on Chrome.
PWAs are called "progressive" because they can take advantage of new features supported by modern browsers and attempts to solve one of the biggest challenges in modern app development, cross-platform apps with native features and performance.

Static Websites generated using SSGs such as Pelican, Hugo, Gatsby, etc. are perfect candidate for conversion to PWA simply because they are easiest to convert.
Prerequisites
The only prerequisite is that a "Service Worker" definition that is a JavaScript file. But this file needs to be in the root of the website, i.e. "/" otherwise its scope will be limited.
Step 1: Create a file named SW.js in your content/extras folder and add the below content in the file
//extras/SW.js
console.log("I'm you service worker")
Step 2: To ensure this file is stored in the root folder of your website, edit the pelicanconf.py and add the following line
STATIC_PATHS = ["images", "extra/SW.js"]

EXTRA_PATH_METADATA = {"extra/SW.js": {"path": "SW.js"}}
This will first establish SW.js as a static file and then add instructions to copy it from extras to root. by using EXTRA_PATH_METADATA.
Create the PWA manifest & Add the icons
The manifest is a JSON file that outlines how your PWA will behave. Create a file named site.webmanifest and place it under your static / asset folder.
The content of the manifest is quite self-explanatory and should contain
{
    "name": "<your website name>",
    "short_name": "<your website short name>",
    "icons": [
        {
            "src": "img/android-chrome-192x192.png",
            "sizes": "192x192",
            "type": "image/png"
        },
        {
            "src": "img/maskable_icon.png",
            "sizes": "512x512",
            "type": "image/png",
            "purpose": "any maskable"
        }
    ],
    "start_url": "/",
    "display": "standalone",
    "orientation": "portrait",
    "background_color": "#ffffff",
    "theme_color": "#ffffff"
}
The above files also identifies the icons that should be used. Place the icons with the above names and sizes in your image folder. You can use maskable.app to create one.
Add the manifest link to your tempalte
By adding the below line (make sure to change the path as appropriate)
<link rel="manifest" href="/assets/site.webmanifest">
Test your manifest
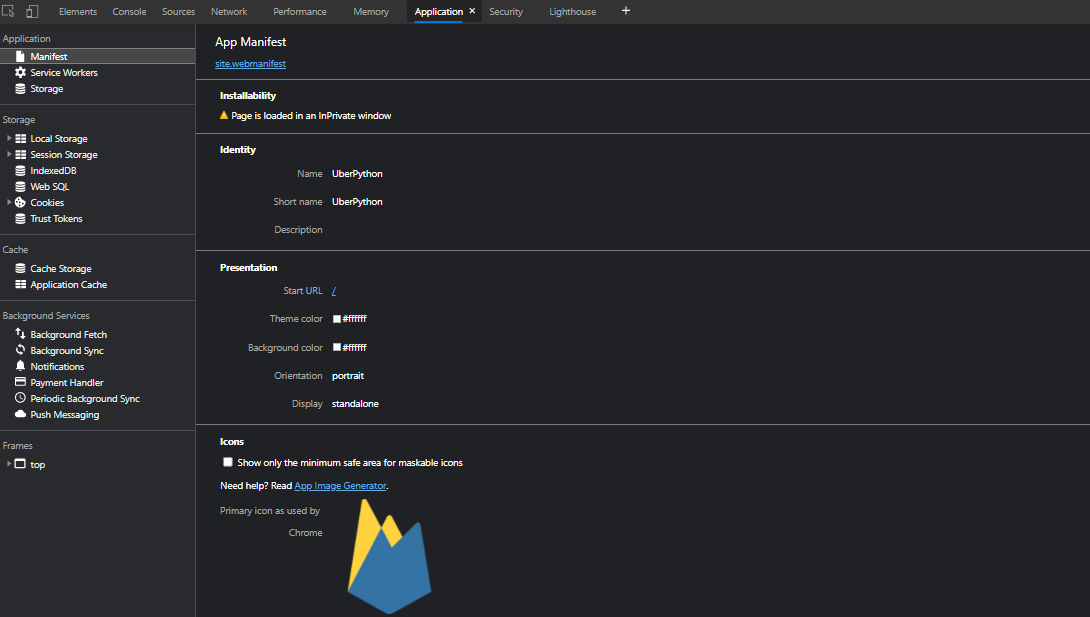
Open your website in either Chrome or Edge browser, press F12 or go to Developer Tools, and then click on Application Tab. If you've configured the manifest correctly, you shold see something similar to the below

Register the service worker
This has to be in your main theme JavaScript application file. E.g. in CloudBytes's case the app.js is stored under //assets/js folder. If you view source, you should see an HTML header that links this
<script defer src="/assets/js/app.js"></script>
If you don't already have it, create an
app.jsas per above and add the header in your Pelican layouts.
In the app.js add the below snippet to register your service worker file
// #app.js
// Check that service workers are supported
if ('serviceWorker' in navigator) {
    // Use the window load event to keep the page load performant
    window.addEventListener('load', () => {
        navigator.serviceWorker.register('/SW.js');
    });
};
Test the Service Worker configuration
If you have configured it correctly, go to the Service Worker in section in Application tab of the developer tools, if there are no errors it means your service worker is configured correctly.
Additionally, in the Dev Tools Console Tab, your should see the message
I'm you service worker
If you got this, your service worker is registered successfully, but it still needs configuration.
Configure the Service Worker
Right now the service worker isn't doing anything except print to console, we need to configure the service worker to cache requests, and static files.
To do that we will use Workbox, a library developed by Google to make it easier to create PWAs.
Caching Pages as they are visited
Change the contents of SW.js to the below
importScripts('https://storage.googleapis.com/workbox-cdn/releases/6.1.5/workbox-sw.js');

// Cache page navigations (html) with a Network First strategy
workbox.routing.registerRoute(
    // Check to see if the request is a navigation to a new page
    ({ request }) => request.mode === 'navigate',
    // Use a Network First caching strategy
    new workbox.strategies.NetworkFirst({
        // Put all cached files in a cache named 'pages'
        cacheName: 'pages',
        plugins: [
            // Ensure that only requests that result in a 200 status are cached
            new workbox.cacheableResponse.CacheableResponsePlugin({
                statuses: [200],
            }),
        ],
    }),
);
This snippet makes sure that whenever a page is requested, it first tries to download it from internet, if the service worker if not able to fetch a response, it will serve the page from the cache it has built. Additionally, it caches pages only if they are successfully fetched.
Cache static files
Add the below snippet to enable caching of stylesheets and scripts.
// Cache CSS, JS, and Web Worker requests with a Stale While Revalidate strategy
workbox.routing.registerRoute(
    // Check to see if the request's destination is style for stylesheets, script for JavaScript, or worker for web worker
    ({ request }) =>
        request.destination === 'style' ||
        request.destination === 'script' ||
        request.destination === 'worker',
    // Use a Stale While Revalidate caching strategy
    new workbox.strategies.StaleWhileRevalidate({
        // Put all cached files in a cache named 'assets'
        cacheName: 'assets',
        plugins: [
            // Ensure that only requests that result in a 200 status are cached
            new workbox.cacheableResponse.CacheableResponsePlugin({
                statuses: [200],
            }),
        ],
    }),
);
Cache Images
Add the below snippet to cache images that are successfully fetched.
// Cache images with a Cache First strategy
workbox.routing.registerRoute(
    // Check to see if the request's destination is style for an image
    ({ request }) => request.destination === 'image',
    // Use a Cache First caching strategy
    new workbox.strategies.CacheFirst({
        // Put all cached files in a cache named 'images'
        cacheName: 'images',
        plugins: [
            // Ensure that only requests that result in a 200 status are cached
            new workbox.cacheableResponse.CacheableResponsePlugin({
                statuses: [200],
            }),
            // Don't cache more than 50 items, and expire them after 30 days
            new workbox.expiration.ExpirationPlugin({
                maxEntries: 50,
                maxAgeSeconds: 60 * 60 * 24 * 30, // 30 Days
            }),
        ],
    }),
);
Test your PWA
After you have configured the above, open your website in using Chrome browser in your smartphone. You should get a small banner at the bottom asking if you want to add your website to the homescreen. Clicking on it will install your website like an app.