Beginner's guide to installing Pelican in a Container
Pelican is a type of Static Site Generator (SSG) written in Python that follows the Jamstack architecture pattern. It is easily the most popular Python based SSG with Nikola and Lektor coming in a distant second and third.
Pelican's popularity is largely due to the fact that
a. It is written in Python
b. It has a rich ecosystem of plugins and themes
c. It uses Jinja2 as templating language, making it extremely easy to build your own theme
d. It is extremely stable, having been around for almost a decade and well documented
e. It is actively maintained by close to 400 contributors

Getting Started
First create your GitHub repository that will host the codebase. Then
- Fire up VSCode and press
Shift+Ctrl+Pto bring up the command palette. - Search for "Clone Repository in Container Volume", then follow the steps to select the repository you want to clone.
- When asked to choose a container configuration, select "Show all definition" and search for Python 3,
- then select Python 3.9 from the dropdown.
[OPTIONAL]Also, choose to install NodeJS as well by selecting the checkbox when promtpted.
While we don't need NodeJS for Pelican, you will need NPM (which gets installed together as a bundle) in future to work directly with Firebase. However, this is an optional step and not required for this tutorial.
If the container was created you would see a folder named .devcontainer created in VSCode explorer pane. This folder contains two files, a Dockerfile that contains the configuration of your docker and a .devcontainer.json that stores the preferences for the VSCode workspace you're in currently.
You should now have a devcontainer configured.
Open the VSCode terminal, you will notice you're inside a Linux machine. To verify, run
cat /etc/*-release
This will display something similar to the below
PRETTY_NAME="Debian GNU/Linux 10 (buster)"
NAME="Debian GNU/Linux"
VERSION_ID="10"
VERSION="10 (buster)"
VERSION_CODENAME=buster
ID=debian
HOME_URL="https://www.debian.org/"
SUPPORT_URL="https://www.debian.org/support"
BUG_REPORT_URL="https://bugs.debian.org/"
Installing Pelican in the devcontainer
In VSCode, bring up your terminal and then install Pelican by running
pip install "pelican[markdown]"
This will install pelican and all its dependencies including support for markdown
Step 3: Setup Pelican
In the terminal type the below to trigger Pelican setup
pelican-quickstart
This starts the interactive setup where you are asked a series of question, choose as per below 👇🏽 (blank means leave the default by pressing Enter)
> Where do you want to create your new web site? [.]
> What will be the title of this web site? MyPelicanWebsite
> Who will be the author of this web site? Me
> What will be the default language of this web site? [en]
> Do you want to specify a URL prefix? e.g., https://example.com   (Y/n) N
> Do you want to enable article pagination? (Y/n) Y
> How many articles per page do you want? [10]
> What is your time zone? [Europe/Paris]
> Do you want to generate a tasks.py/Makefile to automate generation and publishing? (Y/n)
> Do you want to upload your website using FTP? (y/N)
> Do you want to upload your website using SSH? (y/N)
> Do you want to upload your website using Dropbox? (y/N)
> Do you want to upload your website using S3? (y/N)
> Do you want to upload your website using Rackspace Cloud Files? (y/N)
> Do you want to upload your website using GitHub Pages? (y/N)
Done. Your new project is available at /workspaces/myWorkingFolder
We haven't used the default GitHub Pages setting because it only publishes the output but doesn't automate the process of building.
You content is stored in the "content" folder, create a file named my-first-post.md in that folder with the below contents
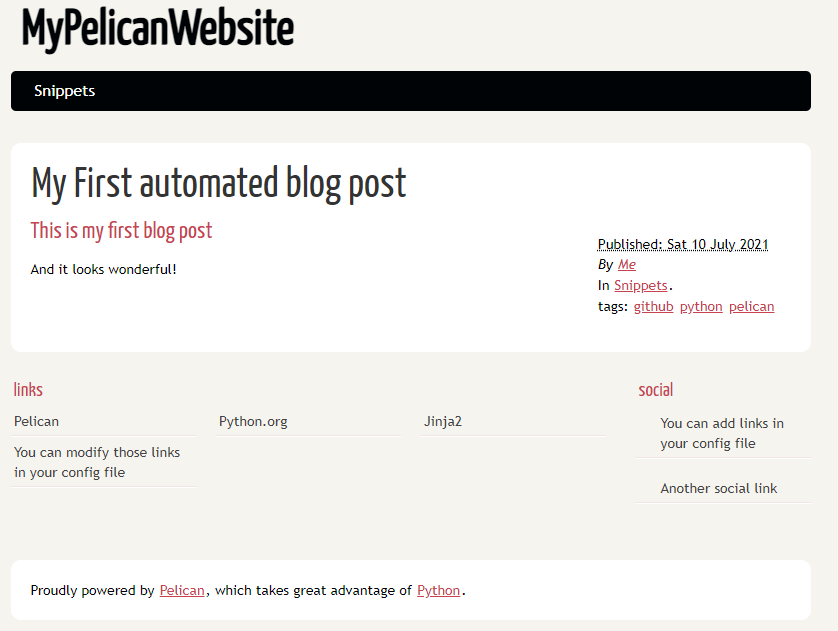
Title: My First automated blog post
Date: 2021-07-10
Category: Snippets
Tags: github, python, pelican
Author: Me
Summary: A guide to configuring automated Continuous Deployment (CD) of \
static site generated by Pelican SSG from GitHub repository to GitHub pages using GitHub Actions

## This is my first blog post
And it looks wonderful!
Test your Pelican website
To generate and serve your Pelican Website, run the below command
make devserver
This will build your blog in the output folder and start serving it on localhost:8000.
Start your browser and open the URL localhost:8000, and congrats 🎉🙌🏽🎇🎊🎈 you blog is up and running.
