Auto Deploy Pelican Websites to Firebase Hosting
A step by step guide to installing and configuring Pelican and hosting the final blog on Firebase Hosting
On this page
In a previous article I wrote about how you can host a simple Pelican static website on Github Pages and automate the deployment process using Github Action.
GitHub Pages is brilliant and extremely useful for a simple blog or small webites, but quickly becomes limited in features if you’re trying to build anything serious.
For starters, if you recall from the Jamstack explanation and its principles, you rely on third party APIs. E.g. if you want to build a user management system into your website you will need to use a Auth API from a third party such as Okta, Azure, or AWS.
This is where Firebase has a massive advantage by providing an integrated end to end development framework. Thus if you want to build more dynamic features into your Pelican / Jamstack website, you may want to use Firebase for your hosting purposes.
In this guide, we will discuss how to setup Continous Deployments (CD) to Firebase Hosting so that your changes are deployed automatically on git push.
Getting started
After discovering VSCode devcontainers, I’ve just stopped using Python’s virtual environment. So we will use devcontainers to clone the repository and prepare the development environment.
So in this tutorial, we will
- Set up the Pelican development environment insite a container and make a simple webpage using the default theme
- Create a Firebase project that will be used to host the website
- Create GitHub secrets that will be used to deploy the Pelican output to Firebase Hosting
- Then create the action to deploy automatically to Firebase Hosting
- Push the codebase back to GitHub repository & watch the fun unfold
The workflow
We will use the following setup & automation to automate the deployment process.

1. Setting up Pelican
Use the instructions in this guide on how to install Pelican in a VSCode devcontainer and create a small blog.
Then capture your dependencies by running
pip freeze > requirements.txt2. Create & configure the Firebase Project
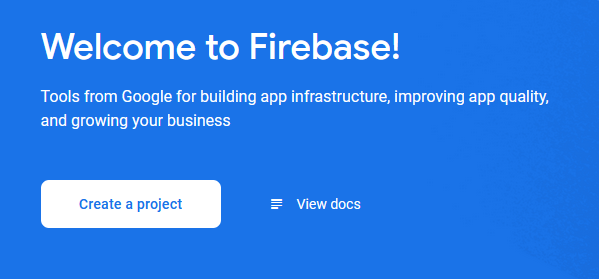
Visit the Firebase Console Home page and register for an account, or sign-in if you already have an account. After that, click on “Create a Project”.
Give your project a name and then follow the instructuions to complete the setup.
After that you need to create two filê in workspace
.firebaserc: Contains the project list and aliases. If you open it you would see something like
{
  "projects": {
    "default": "<your project name>"
  }
}
Instead of “cloudbytes-prod” you should see the project you chose during the configuration.
firebase.json: Contains the configuration of your services,
{
  "hosting": {
    "public": "output",
    "ignore": [
      "firebase.json",
      "**/.*",
      "**/node_modules/**"
    ]
  }
}
3. Create GitHub Secrets
GitHub Secrets is GitHub’s Key Management System (KMS) that excrypts and stores API keys so it can be used in your projects without being visible to anybody, even you.
We need to store the credentials to Firebase Hosting Project as a secret in GitHub so it can be used to push your code directly to Firebase.
To do that
3.1 Get the Service Account JSON
Go to Firebase -> Select your Project -> Click on the ⚙ Settings icon on the left navigation page, then click on Project Settings.
Then click on the Service accounts tab, this will create a Service Account for your project. Service Account credentials are used to interact with Firebase Services.
Scroll to the bottom -> Click on Generate new private key then in the popup box, click again on Generate key.
You will be prompted to save the file ending in .json extension.
WARNING: Never share or upload this service account credentials including in GitHub repository
The right way to handle such credentials is via encrypted secrets.
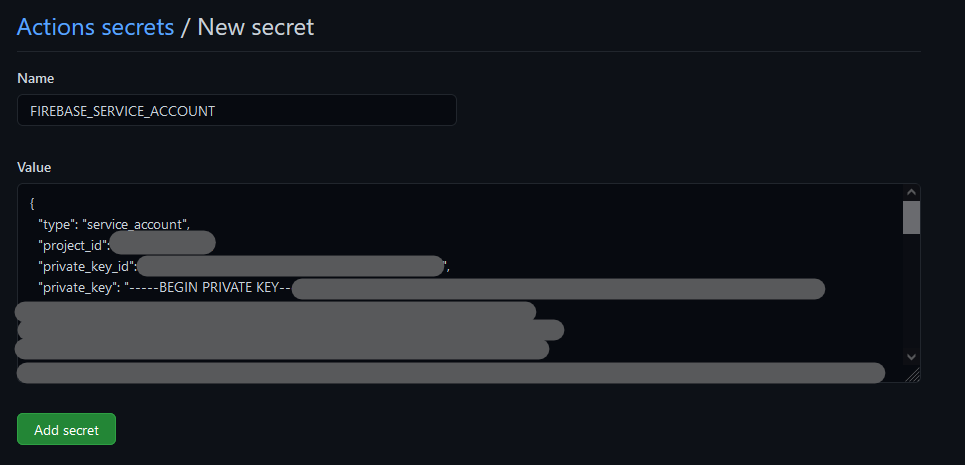
3.2 Store the secret in GitHub Secrets
Open you GitHub repository and on the Settings tab, scroll down and click on Secrets in the navigation pange on left.
Then click on New repository secret button on the top right. Give it any memorable name, e.g. FIREBASE_SERVICE_ACCOUNT and paste the contents of the service account file that you download in previos section then click Add secret to save.
4. Create the action to deploy automatically to Firebase Hosting
Now we have all the building blocks ready, except the GitHub action definition. In VSCode, create a file at the path .github/workflows/deploy-to-firebase.yml.
Add the following content in the file
name: Deploy

on:
  push:
    branches:
      - main

jobs:
  build_and_deploy:
    runs-on: ubuntu-latest
    steps:
    - uses: actions/checkout@v2
    - uses: rehanhaider/pelican-build-action@v0.1.11
      env:
        PELICAN_CONFIG_FILE: app/publishconf.py
        PELICAN_CONTENT_FOLDER: app/content
    - uses: FirebaseExtended/action-hosting-deploy@v0
      with:
        repoToken: '${{ secrets.GITHUB_TOKEN }}'
        firebaseServiceAccount: '${{ secrets.FIREBASE_SERVICE_ACCOUNT}}'
        channelId: live
        projectId: <enter your project id>
YAML is a declarative syntax where it is easy to understand what is going on.
In the first part above, we define that the action will work on push into the main branch of your GitHub repository.
Then we created a job, and named it build_and_deploy that will run on ubuntu-latest version of operating system.
After that we defined the steps that need to be followed which are,
- Use
actions/checkout@v2to access the branch of your repository which contains your code - Use another action that I built named
rehanhaider/pelican-build-action@v0.1.11that will install all of your dependencies stored inrequirements.txtand execute thepelican contentcommand to generate the output in a folder namedoutput - The above action is performed using the environmental variables under
envthat contains the path to the config file and the content folder where the markdown content is stored. - Finally, we use official Firebase action to deploy the contents of
outputfolder that the action will create into Firebase hosting - The above action will be performed with a
repoTokenthat is provided by GitHub automatically, theFIREBASE_SERVICE_ACCOUNTcredentials that we stored in previous section, into thelivechannel and finally theprojectIdthat you should change to the name of the project you had created on Firebase
5. Push the Code to GitHub and watch the fun unfold
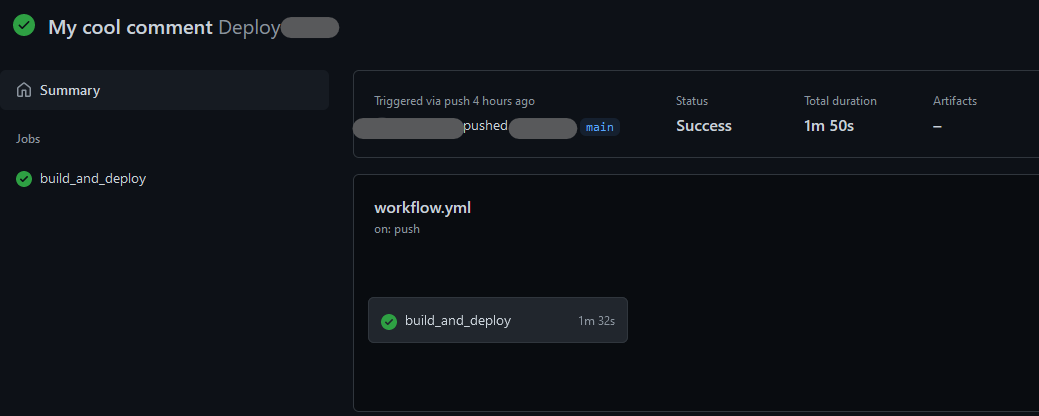
Open the VSCode terminal and run the below command to add all your files to your GitHub repository tracking
git add .Commit your changes to the repository by running
git commit -m "My cool comment"Then push your code to the GitHub by running
git pushNow go to GitHub.com and browse to your repository page, click on Actions tab you will see the action being executed. Click on the action to see more details.
Now your Pelican Blog is setup for auto deployment to firebase, everytime you push your code.
Need help?
Start a discussion on GitHub if you’ve got questions or improvements. Open discussions →