Run Flask Apps on Elastic Beanstalk
Create a simple Flask app and run on AWS Elastic Beanstalk
On this page
AWS Elastic Beanstalk is a service from AWS that makes it easier for developers who want to focus on their code to deploy their applications to AWS.
Deploying an app to EC2 is a lot of System Admin work. It involves
- setting up a new instance,
- configuring the instance,
- configuring storage,
- installing the runtime,
- installing dependencies,
- configuring web servers and ports,
- configure scalability, and load balancing.
After you’ve done all that, you somehow need to transfer your files to the VM and then start the app and ensure the app starts on reboot. And even if you manage to do all that you need to figure out how to troubleshoot and debug your app in case of failures.
AWS Elastic Beanstalk abstracts all of that and reduces developers task to only uploading the code and customisations.
In this guide we will look at how to deploy a sample Flask app to AWS Elastic Beanstalk.
Deploying a Flask App to AWS Elastic Beanstalk
To deploy a Flask app to AWS Elastic Beanstalk, you need to do the following in order:
- Create your Flask app & provide Python dependencies: This will be your code that will be deployed to AWS Elastic Beanstalk along with
requirements.txt - Zip your app: Zip all of your source code and dependencies into a single file.
- Upload the zip to S3: The zip file needs to be staged to S3 before deployment
- Create Elastic Beanstalk Application: This will deploy your code and create an application, but you must create the environment for your application to work.
- Create Elastic Beanstalk Environment: Create the environment & start the application.
1. Create the Flask App
a) We will use the simple flask app below. Create a new file named application.py and paste the following code into it.
The name of the file containing your code must be
application.pytheFlaskobject too should be nameapplication
# filename: application.py
from flask import Flask
application = Flask(__name__) # This needs to be named `application`


@application.route("/")
def index():
    return "<h1>Hello World!</h1>"


@application.route("/another")
def another():
    return "<h1>Another Page!</h1>"


if __name__ == "__main__":
    application.run(debug=True)
b) You also need to capture the dependecies in a file named requirements.txt and paste the following code into it.
Flask2. Zip the files
a) Install zip utility.
sudo apt-get install zipb) Then zip the files.
zip -r aws-flask-app.zip application.py requirements.txt3. Upload the files to S3
a) First you need to create an S3 bucket where these artefacts will be staged before deployment to Elastic Beanstalk.
aws elasticbeanstalk create-storage-locationThis will output something similar to the following:
{
  "S3Bucket": "elasticbeanstalk-us-east-1-123456789012"
}
b) Then upload the artefacts to the S3 bucket mentioned above by running:
aws s3 cp aws-flask-app.zip s3://<S3 Bucket>/aws-flask-app.zip4. Create the Elastic Beanstalk Application
a) To create an application run the following command.
aws elasticbeanstalk create-application-version \
    --application-name flask-app \
    --version-label v1 \
    --source-bundle S3Bucket="<S3 Bucket>",S3Key="aws-flask-app.zip" \
    --auto-create-application
Here we create a new application called flask-app and deploy the version v1 of the application, any subsequent revisions will have to have a different version label.
We also provided the S3 bucket and key where the zip file is stored.
The --auto-create-application flag will create the application if it does not exist.
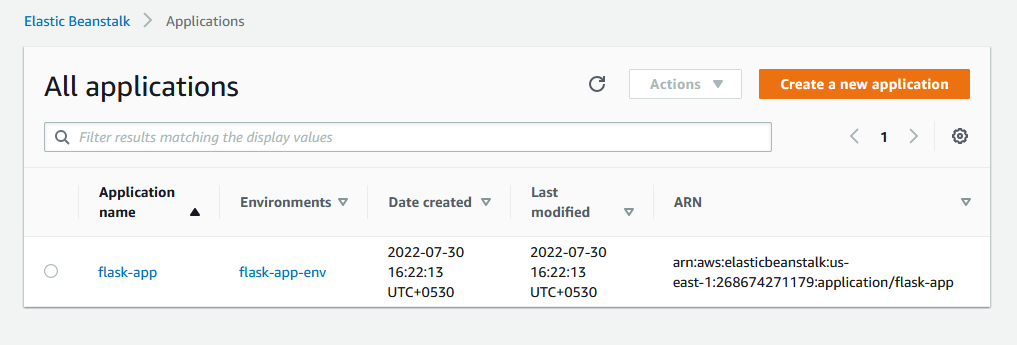
This command has now created an app, that you can see in AWS Management Console.
5. Create the Elastic Beanstalk Environment
a) First you need to create an options file. Create a new file named options.txt and paste the following code into it.
[
    {
        "Namespace": "aws:autoscaling:launchconfiguration",
        "OptionName": "IamInstanceProfile",
        "Value": "aws-elasticbeanstalk-ec2-role"
    }
]
This defines the IAM role that will be used to launch the instance.
b) Then create the environment by running.
aws elasticbeanstalk create-environment \
    --application-name flask-app \
    --environment-name flask-app-env \
    --version-label v1 \
    --solution-stack-name "64bit Amazon Linux 2 v3.3.15 running Python 3.8" \
    --option-settings file://options.txt
The application name must match the application name we specified in previous step. And the version label should match the version of the app that you want to deploy.
--solution-stack-name is the name of runtime you want to use. Apart from the one that we specified, you can find other supported platforms here
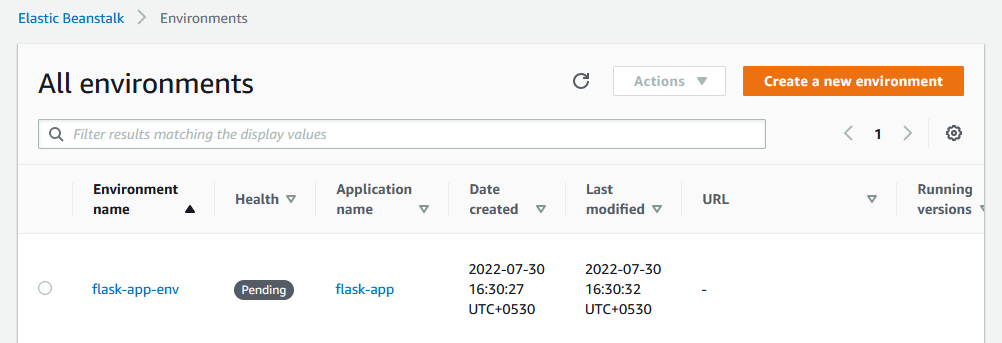
This command has now created an environment and begun to launch it.
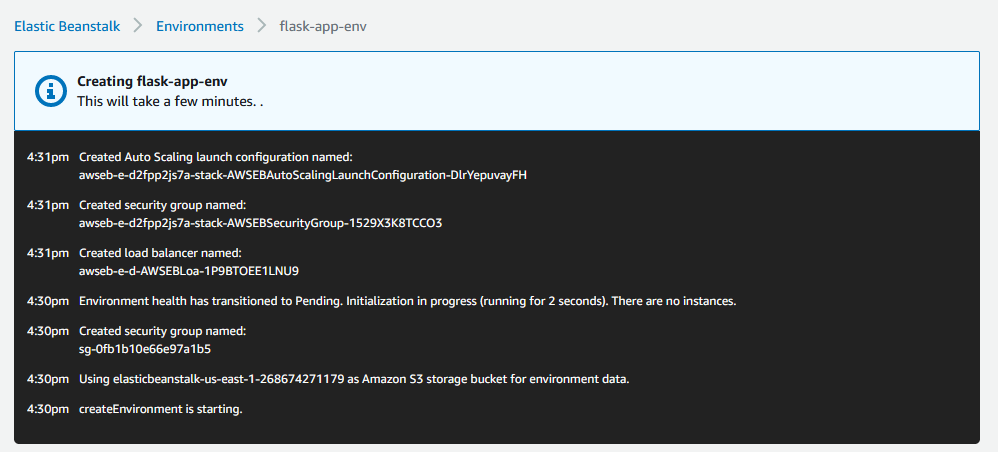
If you click on the environment in the AWS Management Console, you will see the following:
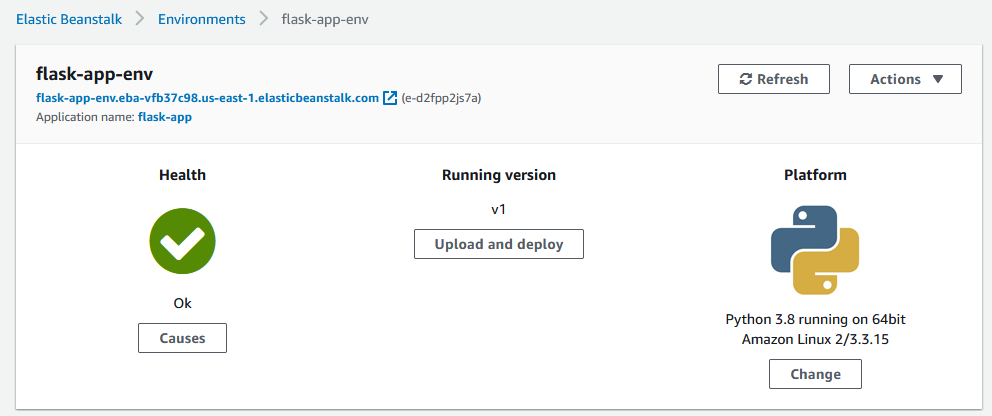
After a while you will see the following that confirms your app has been deployed and launched successfully
Testing the App
On the left hand panel, under flask-app-env, you will see an option Go to environment. Click on it.
This will open a URL in your browser which displays the Flask app you created.
1. Getting the Beanstalk Endpoint URL using CLI
a) To fetch the URL of the Beanstalk endpoint, you can use the following command.
aws elasticbeanstalk describe-environments \
    --environment-name flask-app-env \
    --version-label v1 \
    --query 'Environments[0].EndpointURL'
This will display the URL of the Beanstalk endpoint.
Updating the app
To updated you need to follow the same steps as above, except you need to update the version label. Follow steps 1, 2, and 3 to upload your new code to S3.
1. Update the application
a) We create v2 version of the application by running.
aws elasticbeanstalk create-application-version \
    --application-name flask-app \
    --version-label v2 \
    --source-bundle S3Bucket="<S3 Bucket>",S3Key="aws-flask-app.zip" \
    --auto-create-application
Note the --version-label is v2 now.
2. Update the environment
a) We update the environment by running.
aws elasticbeanstalk update-environment \
    --environment-name flask-app-env \
    --version-label v2 \
    --option-settings file://options.txt
Note the application name and version labels correspond to the application & version you want to deploy.
Delete the app
You need to first delete the environment then the application
To delete the environment, run the following command.
aws elasticbeanstalk terminate-environment \
    --environment-name flask-app-env
To delete the application, run the following command.
aws elasticbeanstalk delete-application \
    --application-name flask-app
To check if there are any applications left, run the following command.
aws elasticbeanstalk describe-application-versionsNeed help?
Start a discussion on GitHub if you’ve got questions or improvements. Open discussions →