Migrate a DB to RDS using AWS Database Migration Service (DMS)
Use AWS Database Migration Service (DMS) to migrate a database to Amazon RDS by configuring a replication instance, source and target endpoints, and a migration task.
On this page
AWS Database Migration Service (DMS) is a managed service that enables you to migrate databases to AWS quickly and securely. You can use DMS to migrate your data to and from most widely used commercial and open-source databases such as Oracle, PostgreSQL, MySQL, MariaDB, and Amazon Aurora. DMS can also be used to migrate data between on-premises and cloud databases.
Project Overview
In this project, we will use AWS Database Migration Service (DMS) to migrate a database to Amazon RDS. We will create a simple MySQL database on an EC2 instance and then migrate it to an Amazon RDS MySQL instance using DMS.
Steps to migrate a database to Amazon RDS using DMS
There are six main steps to migrate a database to Amazon RDS using DMS:
- Setup the source database - This is not required if your already have a database. We will create a simple MySQL DB on an EC2 instance for this tutorial.
- Setup the target database - We will create an Amazon RDS MySQL instance.
- Create a replication instance - This is a managed service that you can use to migrate your data to and from most widely used commercial and open-source databases such as Oracle, PostgreSQL, MySQL, MariaDB, and Amazon Aurora.
- Create source and target endpoints - These are the source and target databases that needs to be identified in DMS for migration.
- Create a migration task - This is the final step where you create a migration task to migrate the data from the source to the target database.
- Execute the migration task - This is the final step where you execute the migration task to migrate the data from the source to the target database.
Furthermore, we will: 7. Test the migration - We will test the migration by connecting to the RDS instance using a MySQL client and check if the data is migrated. 8. Configure Change Data Capture (CDC) - We will configure Change Data Capture (CDC) to capture changes in the source database and replicate them to the target database. 9. Test the replication with CDC - We will test the replication with CDC by making changes to the source database and checking if the changes are replicated to the target database.
A: Setup the source database
We will create a simple MySQL database on an EC2 instance for this tutorial. You can skip this step if you already have a database. The EC2 instance will be in us-east-2 (Ohio) region with Ubuntu 22.04 and the MySQL database will be installed on it.
Launch an EC2 instance
To begin, go to the EC2 dashboard and click on “Launch Instance”.
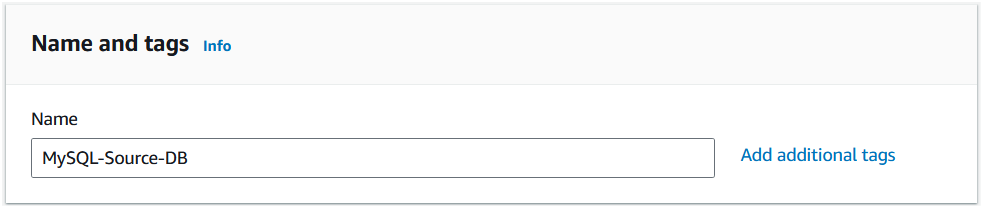
Step 1: Set the “Name and tags” as “MySQL-Source-DB”.
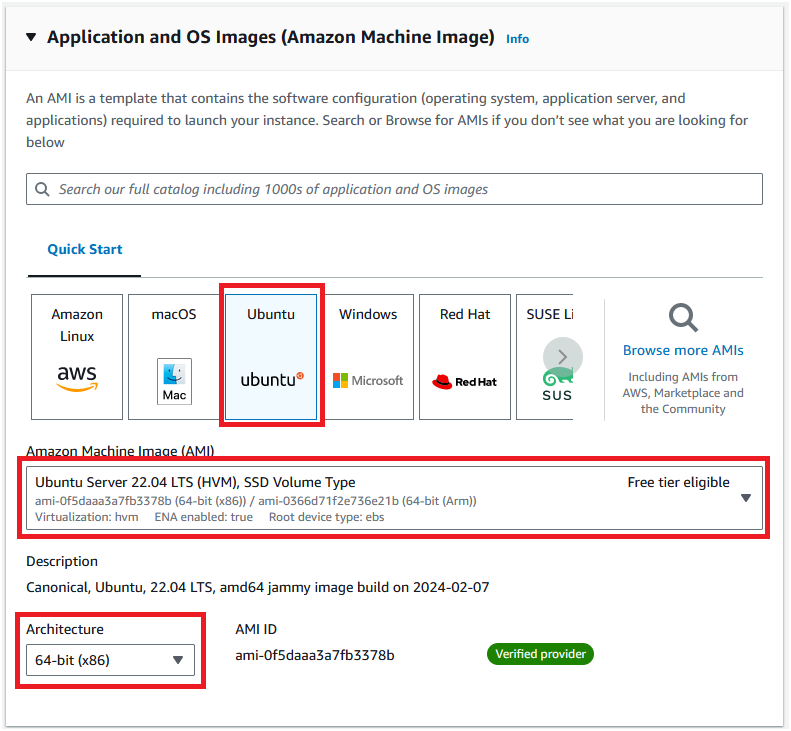
Step 2: Choose an Amazon Machine Image (AMI). We will choose Ubuntu Server 22.04 LTS (HVM), SSD Volume Type. Ensure that “Architecture” is “64-bit (x86)”.
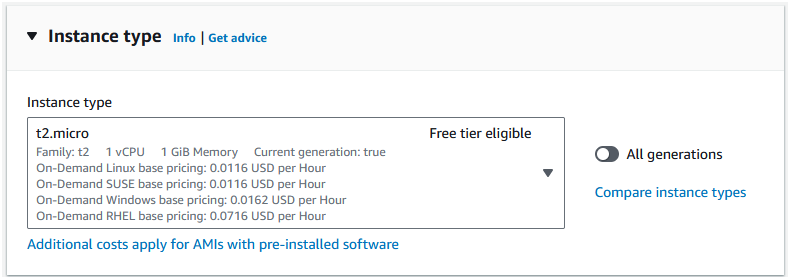
Step 3: Choose an Instance Type. We will choose “t2.micro”.
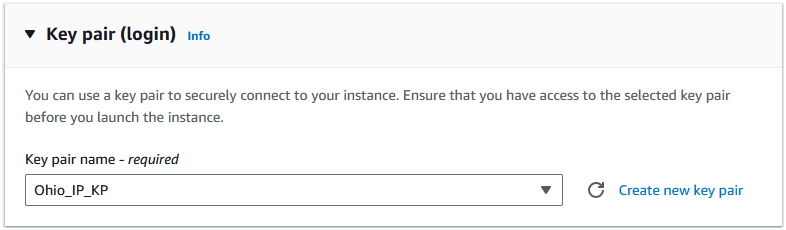
Step 4: Create or reuse a Key Pair to login.
Step 5: In the “Network settings”, click on “Edit” button and select the default VPC. Leave the subnet as default and select “Auto-assign Public IP” as “Enable”.

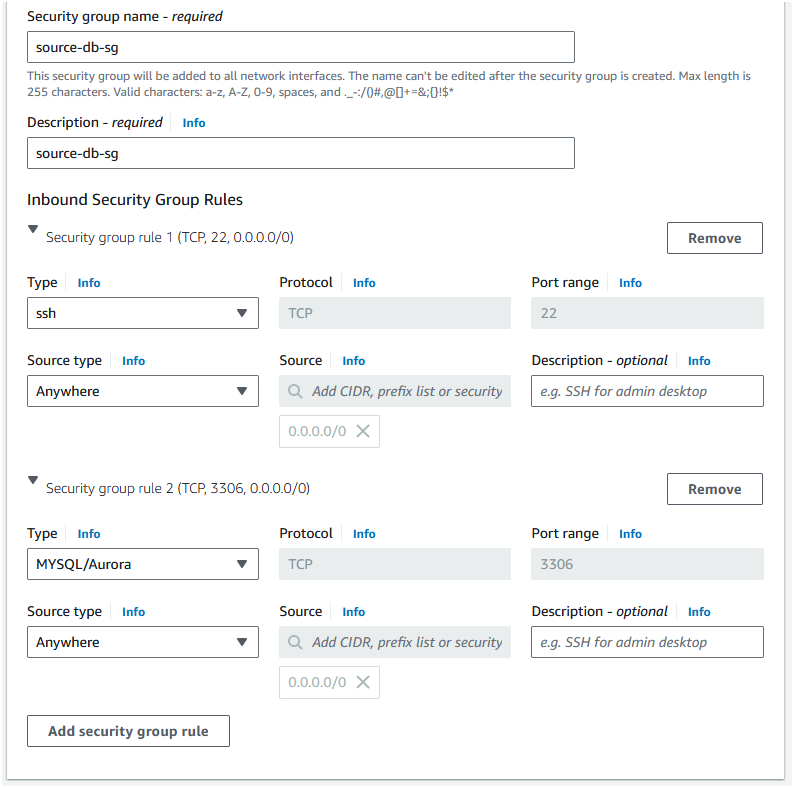
Step 6: Select “Create security group” and set the “Security group name” as “source-db-sg”. Add two rules: one for SSH and one for MySQL/Aurora. You can leave the source as “Anywhere” for this tutorial.
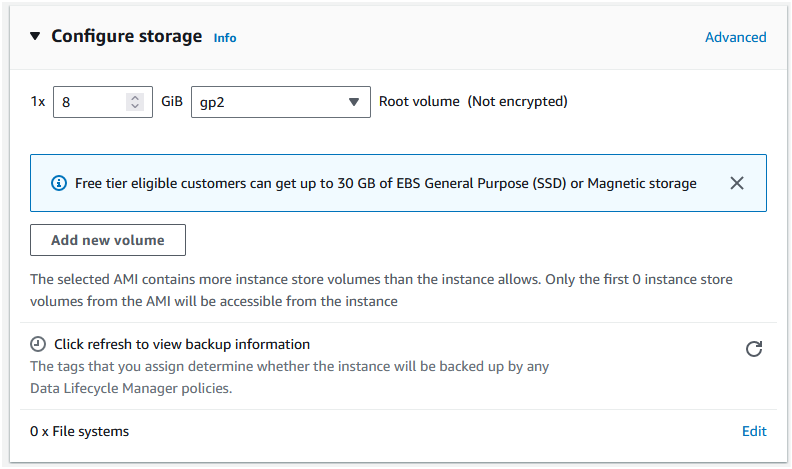
Step 7: In the “Configure storage” section, leave the default settings and click “Next”.
Step 8: Click on the “Launch instance” button to launch the EC2 instance.
Setting up the MySQL database
After the instance is created, connect to the EC2 instance using either SSH or “EC2 Instance Connect” by clicking on the “Connect” button in EC2 dashboard.
Step 1: Login to the EC2 instance, to login using SSH, use the following command:
ssh -i "your-key.pem" ubuntu@instance-public-ipStep 2: Update the package list and install MySQL server using the following commands:
sudo apt update && sudo apt upgrade -yStep 3: Install MySQL server using the following command:
sudo apt install mysql-server -yStep 4: Start the MySQL service and enable it to start on boot using the following commands:
sudo systemctl start mysql && sudo systemctl enable mysqlStep 5: Start and secure the MySQL installation using the following command:
sudo mysql_secure_installationThe following questions will be asked:
- Would you like to setup VALIDATE PASSWORD component? (Press y|Y for Yes, any other key for No) : Press “y” for “Yes”.
- There are three levels of password validation policy: LOW, MEDIUM, and STRONG. Please enter 0 = LOW, 1 = MEDIUM and 2 = STRONG : Press “0” for “LOW”.
- Remove anonymous users? (Press y|Y for Yes, any other key for No) : Press “y” for “Yes”.
- Disallow root login remotely? (Press y|Y for Yes, any other key for No) : Press “y” for “Yes”.
- Remove test database and access to it? (Press y|Y for Yes, any other key for No) : Press “y” for “Yes”.
- Reload privilege tables now? (Press y|Y for Yes, any other key for No) : Press “y” for “Yes”.
Step 6: Login to the MySQL server using the following command:
sudo mysql -u root -pWhen asked for a password, press “Enter” as we have not set a password yet.
Step 7: Create a new database and a new user using the following commands:
CREATE DATABASE source_db;
CREATE USER 'source_user'@'%' IDENTIFIED BY 'password';
GRANT ALL PRIVILEGES ON source_db.* TO 'source_user'@'%';
FLUSH PRIVILEGES;
Replace password with a your password. We will use this user to connect to the source database from the DMS service.
Note: The “source_user” is created with the wildcard ”%” to allow connections from any IP address. This is not recommended for production environments. In production, you should limit the connections to specific IP addresses.
We disabled connecting with the root user remotely in Step 5 hence we have to create a new user to connect remotely the source database. This is a security best practice.
Step 8: Allow remote connection to the MySQL server by editing the MySQL configuration file using the following command:
sudo nano /etc/mysql/mysql.conf.d/mysqld.cnfScroll down to the “bind-address” line, currently this is set to “127.0.0.1” which is the localhost and limits connections only from localhost. Change this to “0.0.0.0” to allow connections from any IP address. Save and close the file.
This change is required to allow the DMS service to connect to the MySQL server.
It is not recommended to allow connections from any IP address in a production environment. Ideally, you should configure the “bind-address” to the IP address of the DMS replication instance.
Step 9: Restart the MySQL service using the following command:
sudo systemctl restart mysqlLoad sample data into the source database
We will load some sample data into the source database to migrate it to the target database.
Step 1: Login to the MySQL server using the following command:
sudo mysql -u source_user -pWhen asked for a password, enter the password you set for the “source_user”.
Step 2: Check if the “source_db” database exists using the following command:
SHOW DATABASES;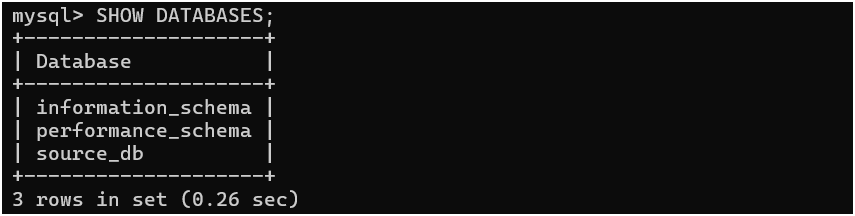
Step 3: Use the “source_db” database using the following command:
USE source_db;Step 4: Create a table a new table named “pets” using the following command:
CREATE TABLE pets (
    name VARCHAR(20),
    owner VARCHAR(20),
    breed VARCHAR(20),
    gender CHAR(1),
    birth DATE,
    death DATE
);
Step 5: Insert some sample data into the “pets” table using the following command:
INSERT INTO pets VALUES ('Puffball','Diane','hamster','f','2001-03-30', '2005-04-30');
INSERT INTO pets VALUES ('Fluffy','Harold','cat','f','2005-02-04', NULL);
INSERT INTO pets VALUES ('Claws','Gwen','dog','m','2015-03-17', '2021-08-24');
INSERT INTO pets VALUES ('Buffy','Harold','dog','f','1989-05-13', '1997-06-23');
INSERT INTO pets VALUES ('Fang','Benny','dog','m','1990-08-27', '1998-08-27');
INSERT INTO pets VALUES ('Bowser','Diane','dog','m','1979-08-31', '1995-07-29');
INSERT INTO pets VALUES ('Chirpy','Gwen','bird','f','1998-09-11', NULL);
INSERT INTO pets VALUES ('Whistler','Gwen','bird','m', '1997-12-09', NULL);
INSERT INTO pets VALUES ('Slim','Benny','snake','m','1996-04-29', '2000-06-29');
INSERT INTO pets VALUES ('Snowball','Diane','cat','f','1999-03-30', '2015-04-30');
Step 6: Check if the data is inserted into the “pets” table using the following command:
SELECT * FROM pets;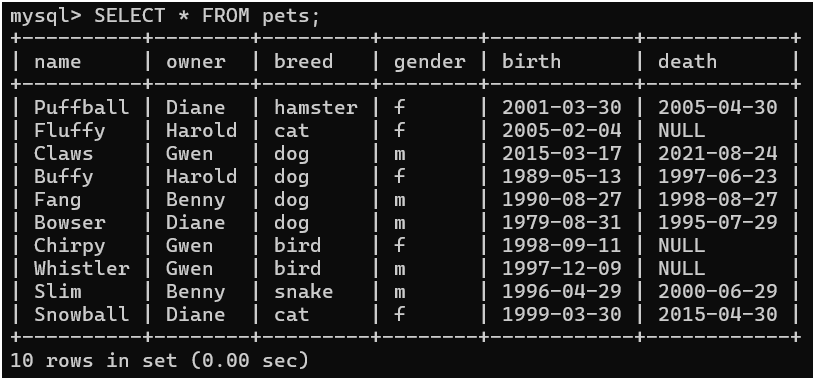
The source database is now setup and ready for migration.
B: Setup the target database
We will create an Amazon RDS MySQL instance as the target database. The RDS instance can be in a different region than the source database, for this tutorial, we will keep it in Ohio region.
Create an Amazon RDS MySQL instance
To begin, go to the RDS dashboard and click on “Create database”.
Step 1: Choose a database creation method. Select “Standard Create”.
Step 2: Select the database engine. Select “MySQL”.
Step 3: In the “Templates” section, select “Free tier”.
Step 4: In the “Settings” section, set the “DB instance identifier” as “mysql-target-db”. Leave the “Master username” as “admin” and set as Master password of your choice.
Step 5: In the “Instance configuration” section, select “Burstable classes” and “db.t3.micro”.
Step 6: In the “Storage” section, leave the default settings and click “Next”.
Step 7: Change the “Public access” as “Yes”. This will allow the DMS service to connect to the RDS instance.
Step 8: Scroll down to the bottom and click “Create database”.
C: Create a replication instance
We will create a replication instance which is a managed service that you can use to migrate your data to and from most widely used commercial and open-source databases such as Oracle, PostgreSQL, MySQL, MariaDB, and Amazon Aurora.
To begin, navigate to DMS and on the left panel click on “Replication instances” under “Migrate data” section.
Step 1: To begin, navigate to DMS and on the left panel click on “Replication instances” under “Migrate data” section.
Step 2: Click on “Create replication instance”.
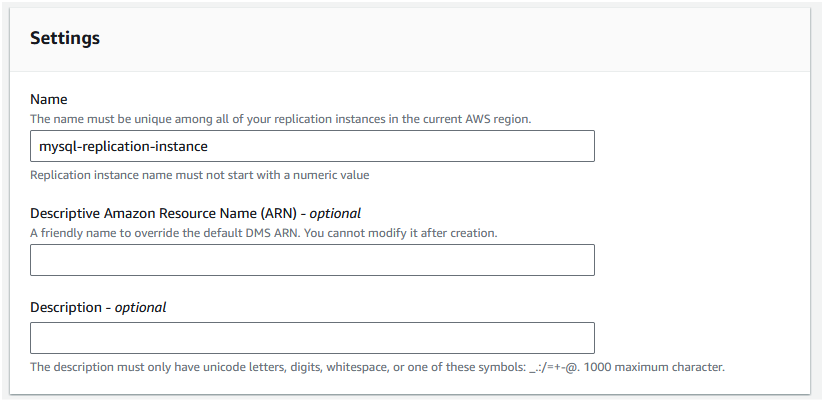
Step 3: In the “Settings” section, set the “Name” to “mysql-replication-instance”. Leave the others as blank.
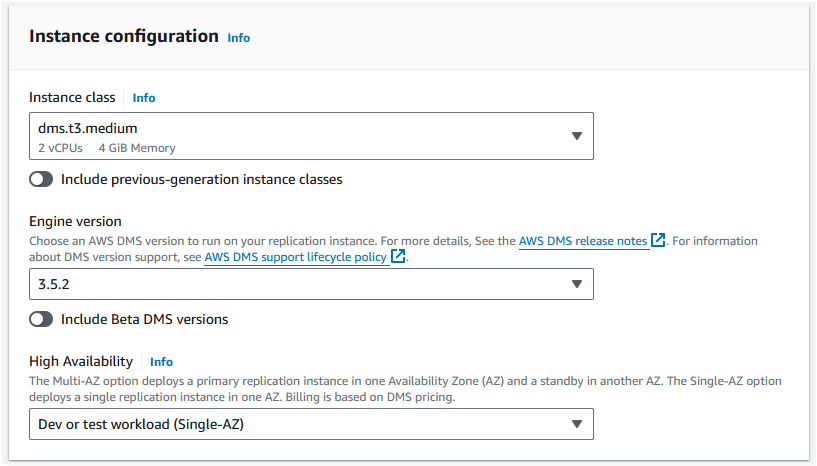
Step 4: In the “Instance configuration”, leave “Instance class” and “Engine version” unchanged. And set the “High availability” as “Dev or test workload (Single-AZ)”.
Step 5: Leave “Storage” and “Connectivity” settings unchanged and click “Create replication instance”.
D: Create source and target endpoints
We will create source and target endpoints which are the source and target databases that needs to be identified in DMS for migration.
Create a source endpoint
Step 1: To begin, navigate to DMS and on the left panel click on “Endpoints” under “Migrate data” section.
Step 2: Click on “Create endpoint”.
Step 3: In “Endpoint type”, select “Source”.
Step 4: In Endpoint identifier, set the “Endpoint identifier” as “mysql-source-endpoint”. Choose “Source engine” as “MySQL”.
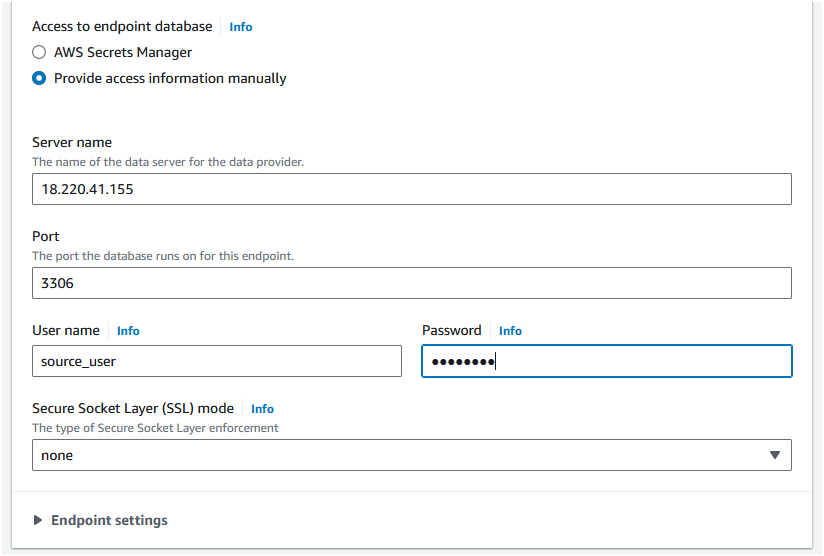
Step 5: Now you should see a “Access to endpoint” subsection. Select “Provide access information manually”. Set the “Server name” as the public IP of the EC2 instance where the source database is running. Set the “Port” as “3306”. Set the “Username” as “source_user” and “Password” as the password you set for the “source_user”.
Step 6: Click on the “Endpoint settings” and check “Use endpoint connection attributes”. In “Extra connection attributes” enter initstms=SET FOREIGN_KEY_CHECKS=0;, then scroll to bottom and click “Create endpoint”.
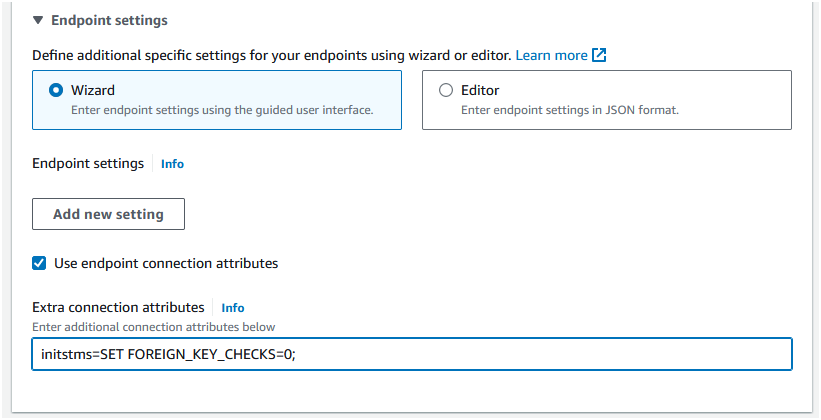
The initstms=SET FOREIGN_KEY_CHECKS=0; is used to disable foreign key checks during the migration. This is required as the DMS service will migrate the data in a specific order and foreign key checks can cause issues during the migration.
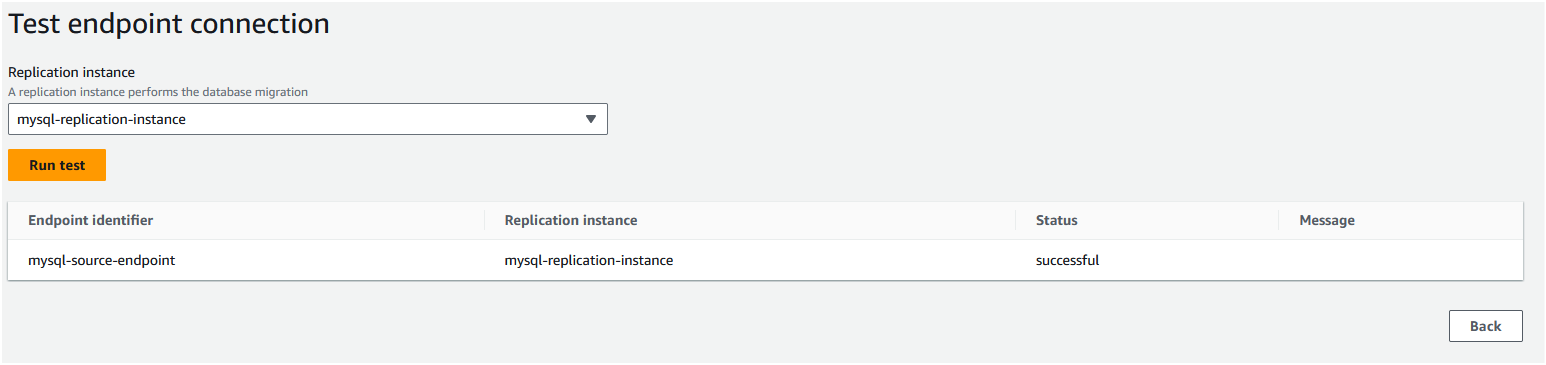
Step 7: Once the source endpoint is created, you should see the status as “Active”. Click on the “mysql-source-endpoint” to see the details. Move to the “Connections” tab and click on “Test connections”. In the subsequent page, click on “Run test” to test if the Replication instance can access the source database.
Create a target endpoint
Step 1: Click on “Create endpoint”.
Step 2: In “Endpoint type”, select “Target”. Since we are migrating to an RDS instance, select “RDS” as the target engine. Then choose the RDS instance that we created earlier as the target endpoint.
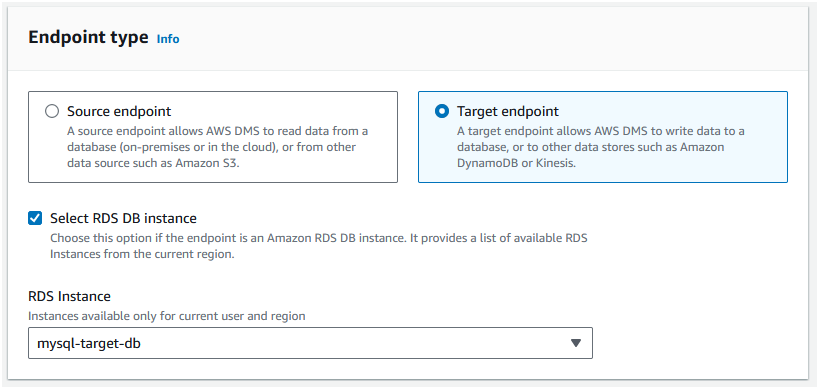
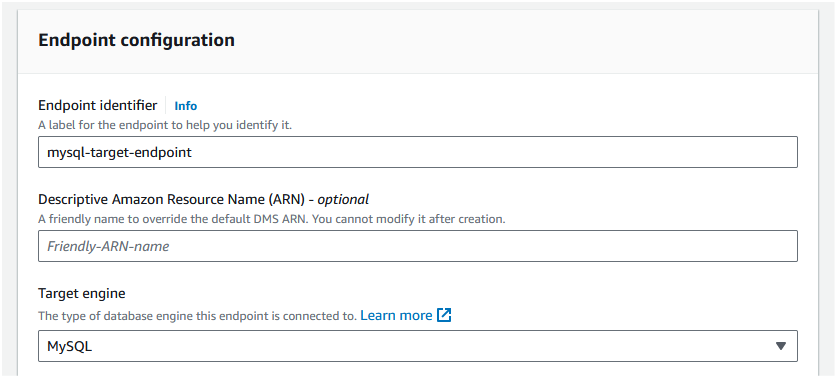
Step 3: In “Endpoint configuration”, set the “Endpoint identifier” as “mysql-target-endpoint”. Choose the Target engine as “MySQL”.
Step 4: Change the “Access to endpoint” settings as “Provide access information manually”. The “Server name” and port should populate automatically. Set the “Username” as “admin” and “Password” as the password you set for the RDS instance.
Step 5: Leave the “SSL mode” as “None” and click “Create endpoint”.

If the full load migration fails then try setting the “Extra connection attributes” as initstms=SET FOREIGN_KEY_CHECKS=0; as we did for the source endpoint.
Step 6: Once the target endpoint is created, you should see the status as “Active”. Click on the “mysql-target-endpoint” to see the details. Move to the “Connections” tab and click on “Test connections”. In the subsequent page, click on “Run test” to test if the Replication instance can access the source database.

E: Create a migration task
We will create a migration task to migrate the data from the source to the target database.
Step 1: To begin, navigate to DMS and on the left panel click on “Database migration tTasks” under “Migrate data” section.
Step 2: Click on “Create task”.
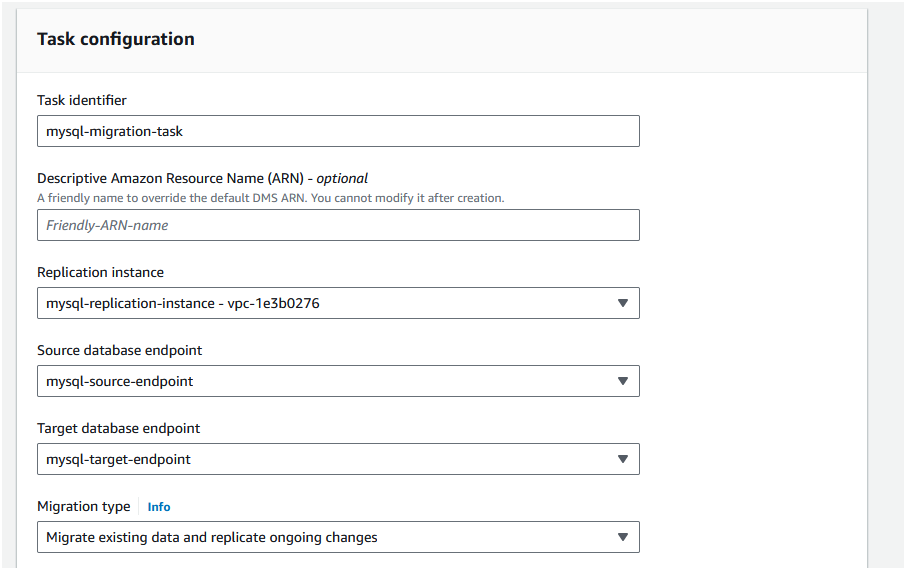
Step 3: In the “Task configuration” section,
- set the “Task identifier” as “mysql-migration-task”.
- Choose the “Replication instance” as “mysql-replication-instance”.
- Choose the “Source endpoint” as “mysql-source-endpoint”.
- Choose the “Target endpoint” as “mysql-target-endpoint”.
- Choose the “Migration type” as “Migrate existing data”.
Step 4: Leave the “Task settings” as default.
Step 5: Under “Table mappings”, click on “Add new selection rule”. Set the “Schema name” as “source_db” and “Table name” as “pets”. Leave the “Action” as “Include”.
Step 6: Under “Premigration assessment”, uncheck “Turn on premigration assessment”.
Step 7: Leave “Migration task startup configuration” as “Automatically on create” and then click “Create task”.
F: Execute the migration task
If you had selected “Migration task startup configuration” as “Automatically start on create”, the task will execute automatically. Based on the amount of data, the migration task can take some time to complete. Once the task is started, you should see the status as “Load complete”.

G: Testing the migration
To test the migration, connect to the RDS instance using a MySQL client and check if the data is migrated.
Step 1: Connect to the RDS instance using a MySQL client. You can use the MySQL Workbench or any other MySQL client.
You can use the following command to connect to the RDS instance using the MySQL client:
mysql -h <rds-endpoint> -u admin -pReplace <rds-endpoint> with the endpoint of the RDS instance. Enter the password when prompted.
Step 2: Check if the “source_db” database exists using the following command:
SHOW DATABASES;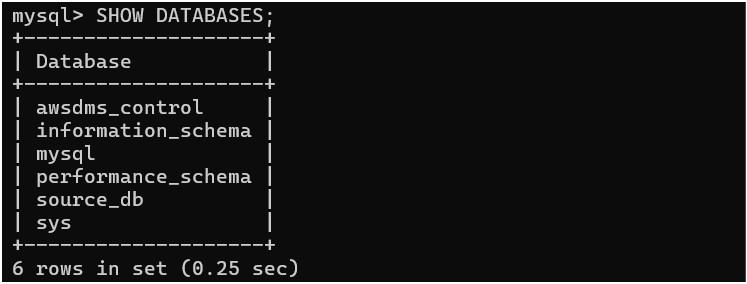
Step 3: Use the “source_db” database using the following command:
USE source_db;Step 4: Check if the data is inserted into the “pets” table using the following command:
SELECT * FROM pets;
The data is successfully migrated from the source database to the target database.
H: Configure Change Data Capture (CDC)
Change Data Capture (CDC) is a feature of DMS that captures changes in the source database and replicates them to the target database. CDC can be used to keep the target database in sync with the source database.
To configure CDC, you need to create a new migration task with CDC enabled. But first, let’s login to the target RDS instance and delete the changes made by DMS.
Reset the target RDS instance
Step 1: Connect to the RDS instance using a MySQL client. You can use the following command to connect to the RDS instance using the MySQL client:
mysql -h <rds-endpoint> -u admin -pReplace <rds-endpoint> with the endpoint of the RDS instance. Enter the password when prompted.
Step 2: See the databases that are present in the RDS instance using the following command:
SHOW DATABASES;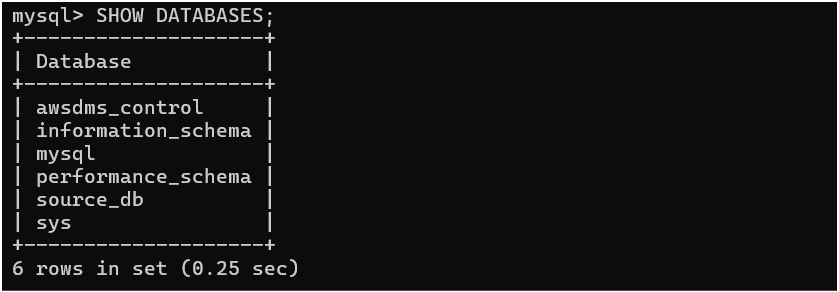
Step 3: Delete the awsdms_control and source_db databases using the following commands:
DROP DATABASE awsdms_control;
DROP DATABASE source_db;
Create a migration task with CDC enabled
Step 1: To begin, navigate to DMS and on the left panel click on “Database migration Tasks” under “Migrate data” section.
Step 2: Click on “Create task”.
Step 3: In the “Task configuration” section,
- set the “Task identifier” as “mysql-cdc-migration-task”.
- Choose the “Replication instance” as “mysql-replication-instance”.
- Choose the “Source endpoint” as “mysql-source-endpoint”.
- Choose the “Target endpoint” as “mysql-target-endpoint”.
- Choose the “Migration type” as “Migrate existing data and replicate ongoing changes”.
Step 4: Leave the “Task settings” as default.
Step 5: Under “Table mappings”, click on “Add new selection rule”. Set the “Schema name” as “source_db” and “Table name” as “pets”. Leave the “Action” as “Include”.
Step 6: Under “Premigration assessment”, uncheck “Turn on premigration assessment”.
Step 7: Leave “Migration task startup configuration” as “Automatically on create” and then click “Create task”.
At this point you the full load migration will start and once it is complete, the CDC will start capturing changes in the source database and replicating them to the target database.
You can check if the full load migration is complete by following the steps in the “Testing the migration” section.
I: Test the replication with CDC
We will test the replication with CDC by making changes to the source database and checking if the changes are replicated to the target database.
Step 1: Connect to the source database using a MySQL client. You can use the following command to connect to the source database using the MySQL client:
mysql -h <source-endpoint> -u source_user -pStep 2: Insert a new record into the “pets” table using the following command:
USE source_db;
INSERT INTO pets VALUES ('Scooby','Shaggy','dog','m','2000-03-30', NULL);
Step 3: Go back to the RDS instance and check if the new record is replicated to the target database using the following command:
USE source_db;
SELECT * FROM pets;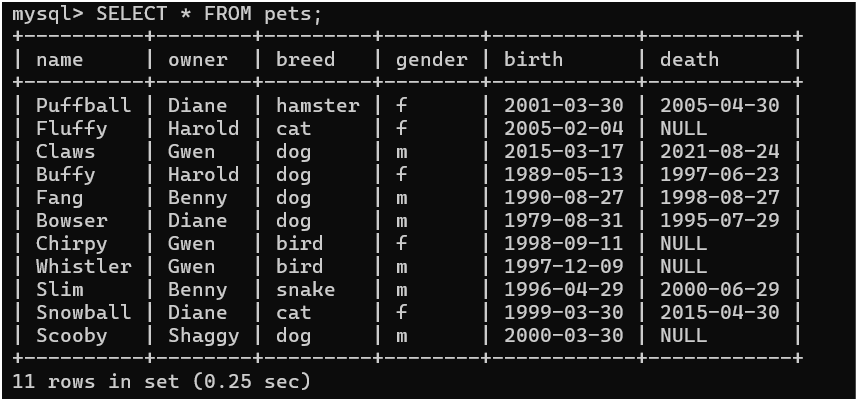
The new record is successfully replicated from the source database to the target database using CDC.
Need help?
Start a discussion on GitHub if you’ve got questions or improvements. Open discussions →