Cross Account Access to AWS Services using IAM Roles
Access another AWS account temporarily using an IAM role and STS
On this page
Think of a situation where you want to give someone access to your AWS account temporarily but you don’t want to create an IAM user for them.
Just like other AWS services, you can create an IAM role with the permissions and have someone assume the role from their own account.
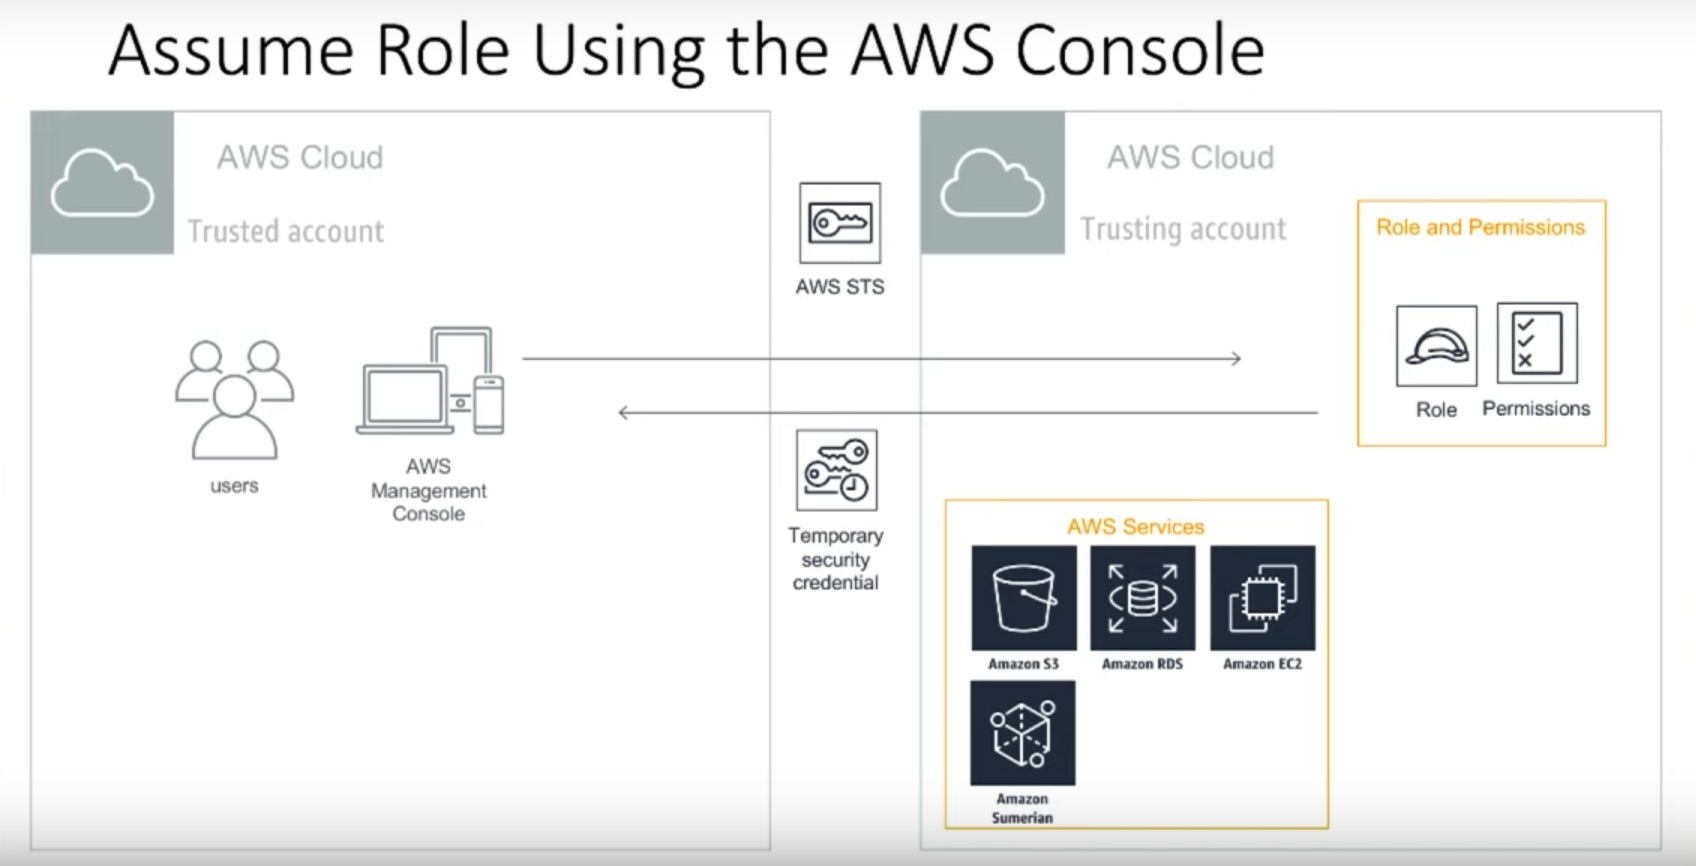
As described above, we will create an IAM role in the trusting account (the account that will give access) and then use the role to assume a role in the trusted account (the account that will be granted access).
Create an IAM Role in the Trusting Account
a) Go to the IAM console then navigate to the Roles section. Click on the Create role button.
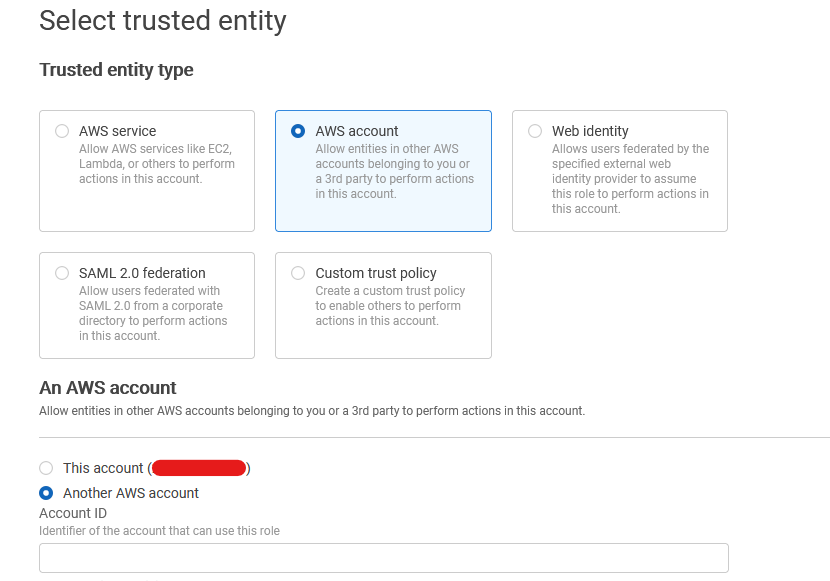
b) Select AWS account in Trusted entity type, select Another AWS account in An AWS account section and then enter the Account ID in Account ID section as shown below.
Click on Next button at the bottom right corner.
c) In Add permissions section, you can select the permissions you want to grant to the role. E.g. in this case I will grant AmazonS3ReadOnlyAccess permission to the role that will give the user the ability to list and view the contents of any S3 bucket. Then click on Next button at the bottom right corner.
d) In Role details choose a Role name, e.g. my-s3-x-account-role and then click on Create role button at the bottom right corner.
Create a Policy in the Trusted Account
a) Now we need to create a policy in the trusted account. Login with a user that has the ability to create IAM policies.
b) Go to the IAM console then navigate to the Policies section. Click on the Create policy button.
c) Switch to the JSON editor and paste the following code into it.
{
    "Version": "2012-10-17",
    "Statement": [
        {
            "Effect": "Allow",
            "Action": "sts:AssumeRole",
            "Resource": "arn:aws:iam::<trusting-account>:role/<role-name>"
        }
    ]
}
Replace <trusting-account> with the account ID of the trusting account and <role-name> with the name of the role that you created in the trusting account, e.g. my-s3-x-account-role above.
Then click on Next: Tags.
d) In Tags section, you can add some tags to the policy. Then click on Next: Review button at the bottom right corner.
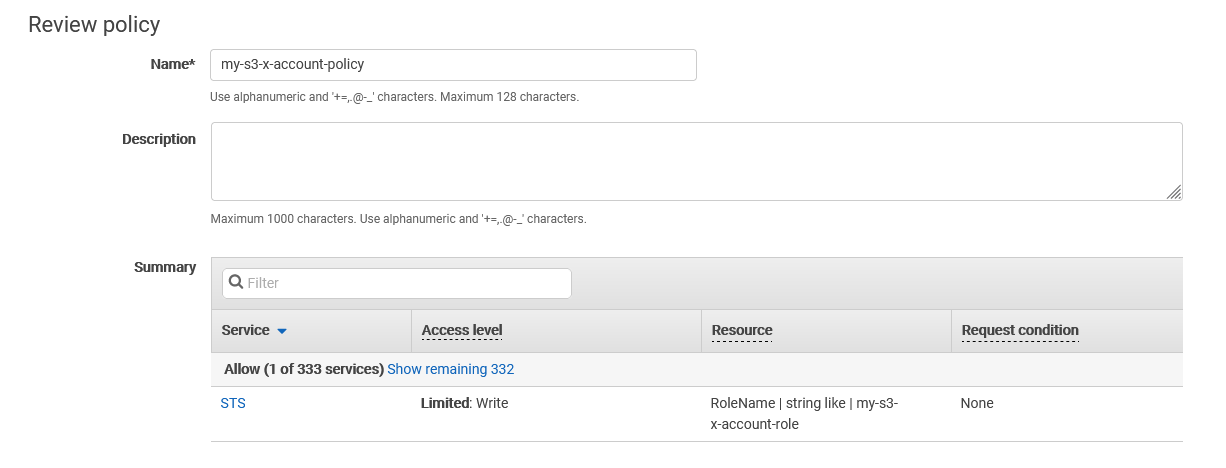
e) Choose a name for the policy, e.g. my-s3-x-account-policy and then click on Create policy button at the bottom right corner. You should see the permissions we granted above. Click on Create once done.
Attach the policy to a user
a) Now we need to attach the policy to a user (or group) in the trusting account. Navigate to Users section in the IAM console.
b) Select the user you want to attach the policy to and then click on Edit button.
c) Under Permissions tab, click on Add permissions button.
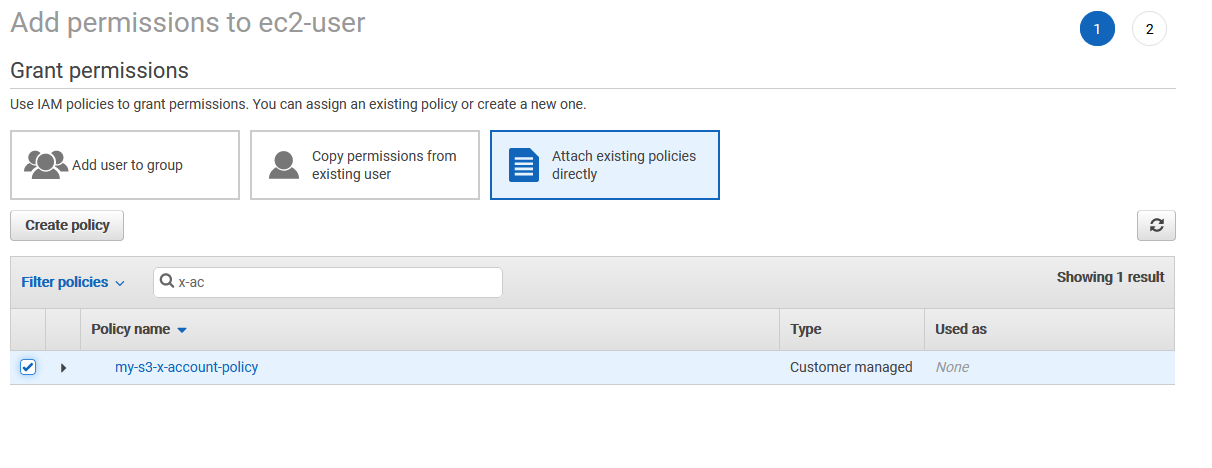
d) In Grant permissions, click on Attach existing policies directly and then select the policy you created above.
e) Click on Next: Review, then click on Add permissions button.
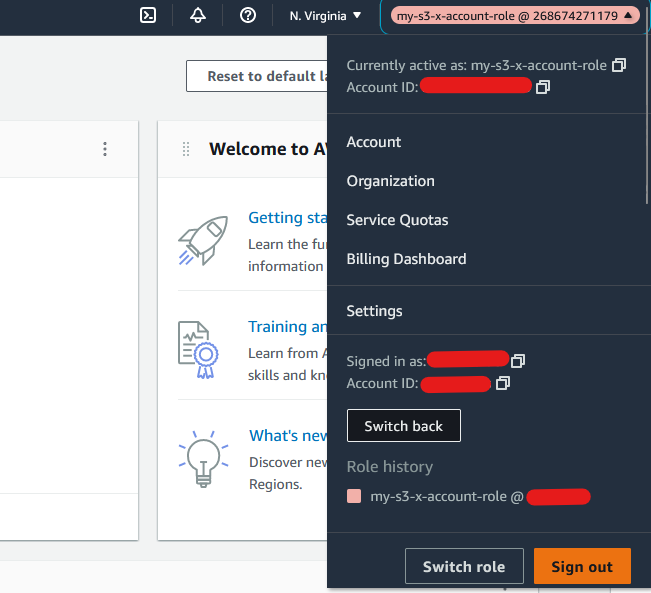
Assume the role in the trusted account
a) Login to the IAM user account that needs to be granted access.
b) Click on the Settings menu on top right corner, then click on “Switch role” button. Then in the Switch Role page, click on Switch Role button.
c) In the ensuring dialogue,
- choose the ID of
trusting-accountas Account, - type the name of the role you created in the trusting account as Role,
- then click on Switch Role button.
d) Now you should see the new role in the Account dropdown.
Need help?
Start a discussion on GitHub if you’ve got questions or improvements. Open discussions →