Creating a 3-Tier Network Architecture VPC with AWS CDK in Python
Guide to creating a 3-Tier Network Architecture VPC with a public, private, and isolated subnet using AWS CDK in Python.
On this page
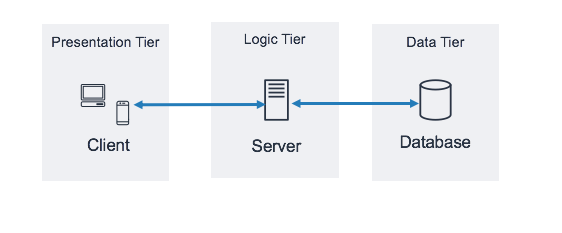
3-tier architecture is an almost ubiquitous design patter in software development. It separates the application into three layers:
- Presentation Layer (Web Tier): This is the front-end layer that users interact with. It typically consists of web servers, load balancers, and other components that handle user requests.
- Application Layer (Business Logic Tier): This layer contains the core functionality of the application. It processes user requests, performs calculations, and interacts with the database layer.
- Data Layer (Database Tier): This layer is responsible for data storage and management.
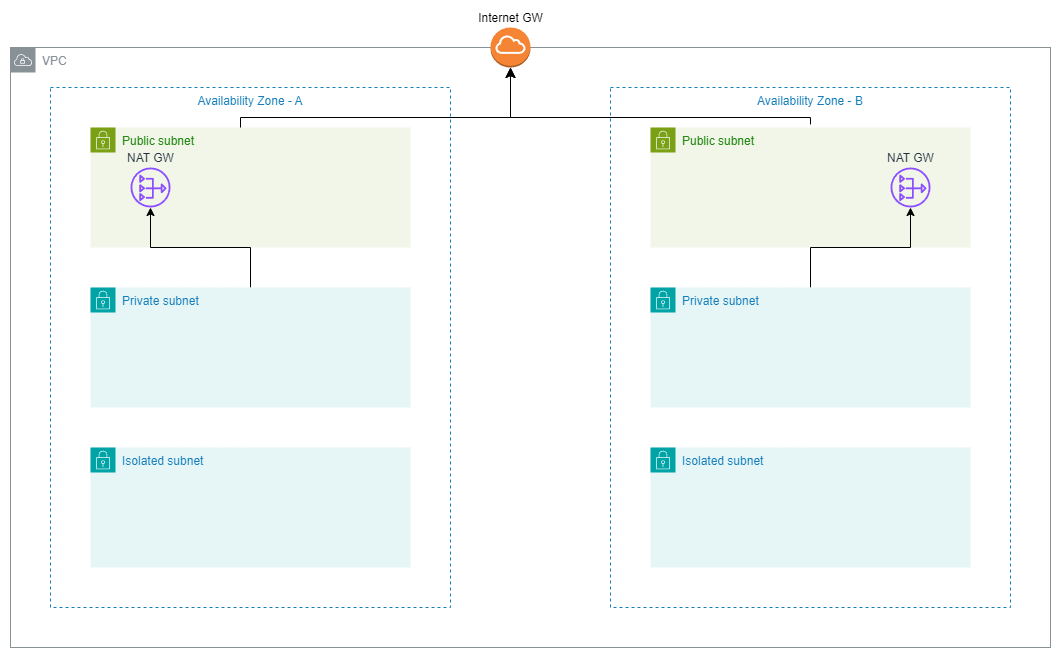
From infrastructure perspective, this architecture is replicated for better management and security. In AWS, this is typically done using a VPC with three subnets:
- Public Subnet: This subnet is accessible from the internet and typically contains resources like load balancers and web servers.
- Private Subnet: This subnet is not directly accessible from the internet and typically contains application servers and other resources that do not need to be publicly accessible. Typically, the servers in this subnet can access the internet through a NAT Gateway.
- Isolated Subnet: This subnet is completely isolated from the internet and typically contains databases and other resources that should neither be accessible from the internet nor should have acccess to the internet.
In this article, we will create a 3-tier VPC architecture using AWS CDK in Python.
3 Tier VPC Architecture
On AWS, the 3-tier VPC architecture looks like this:
Creating a 3-Tier VPC with AWS CDK in Python
We can use default constructs to create a VPC with public, private, and isolated subnets. The following code creates a VPC with 3 subnets:
# filename: cdk_app/my_stack.py
from aws_cdk import (
    Stack,
    aws_ec2 as ec2,
)
from constructs import Construct


class MyStack(Stack):
    def __init__(self, scope: Construct, construct_id: str, **kwargs) -> None:
        super().__init__(scope, construct_id, **kwargs)

        # Define the VPC with three tiers
        vpc = ec2.Vpc(
            self,
            "MyDemoVPC",
            max_azs=2,  # Default is all AZs in the region
            subnet_configuration=[
                # 👇🏽 Public Subnets
                ec2.SubnetConfiguration(
                    name="Public",
                    subnet_type=ec2.SubnetType.PUBLIC,
                    cidr_mask=24,
                ),
                # 👇🏽 Private Subnets
                ec2.SubnetConfiguration(
                    name="Private",
                    subnet_type=ec2.SubnetType.PRIVATE_WITH_EGRESS,
                    cidr_mask=24,
                ),
                # 👇🏽 Isolated Subnets
                ec2.SubnetConfiguration(
                    name="Isolated",
                    subnet_type=ec2.SubnetType.PRIVATE_ISOLATED,
                    cidr_mask=24,
                ),
            ],
        )
Each subnet type is defined using the SubnetConfiguration class.
The subnet_type parameter specifies the type of subnet:
ec2.SubnetType.PUBLIC: Public subnet that is accessible from the internet.ec2.SubnetType.PRIVATE_WITH_EGRESS: Private subnet that can access the internet through a NAT Gateway.ec2.SubnetType.PRIVATE_ISOLATED: Isolated subnet that is not accessible from the internet and does not have internet access.
The cidr_mask parameter specifies the size of the subnet. In this example, we are using a CIDR mask of 24, which means each subnet will have 256 IP addresses (254 usable IPs).
The max_azs parameter specifies the maximum number of Availability Zones to use for the VPC. By default, CDK uses all Availability Zones in the region. In this example, we are using 2 Availability Zones.
The ec2.Vpc construct automatically creates the necessary route tables, internet gateways, and NAT gateways for the VPC based on the subnet types specified.
Deploying the CDK Stack
To deploy the CDK stack, run the following command in the terminal:
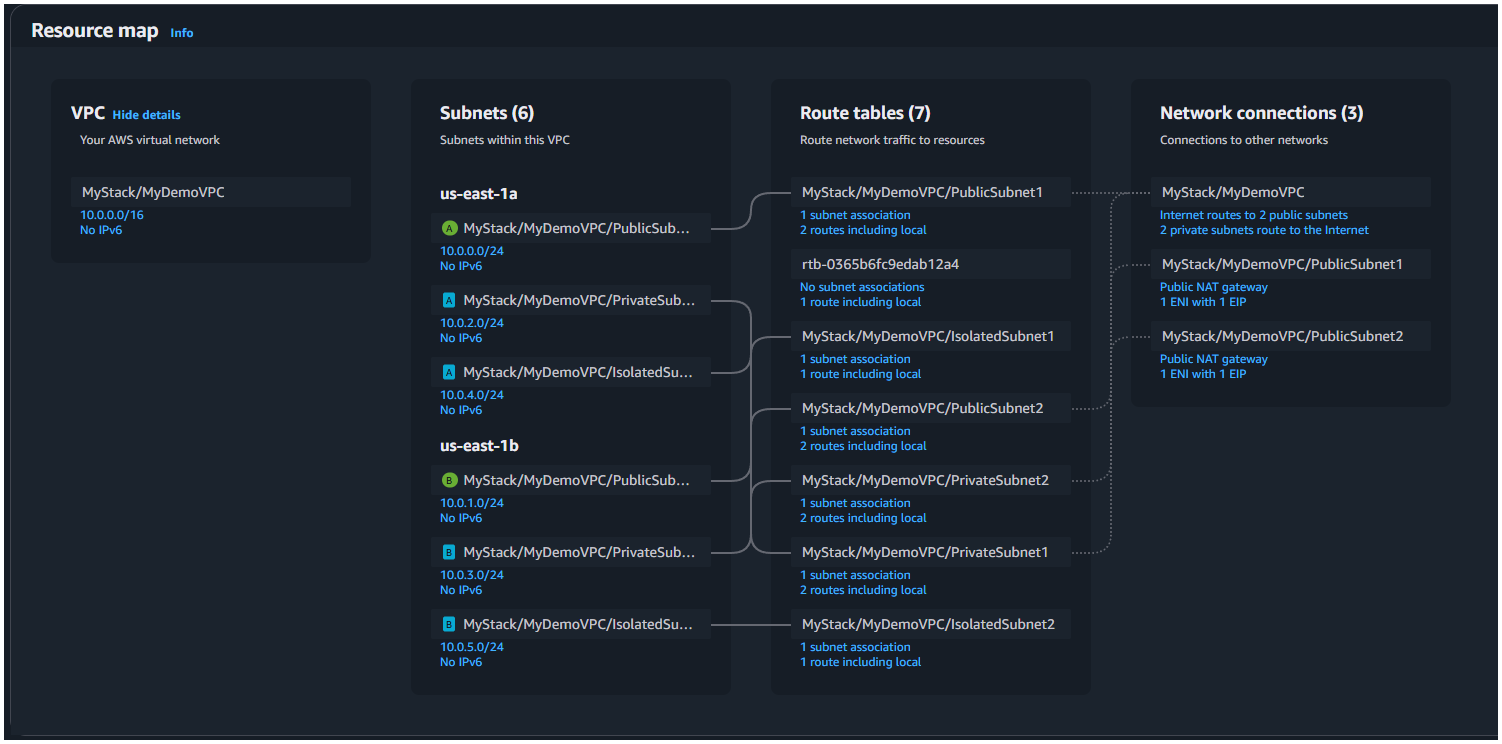
cdk deployThis command will deploy the stack to your AWS account. You can view the resources created in the AWS Management Console under the VPC section.
Conclusion
When you navigate to the VPC section in the AWS Management Console, you can see details of all the resources that have been created and configured in the VPC Resource Map.
However, this is a pre-configured way to create a VPC, if you want to customise the VPC further e.g. CIDR ranges of your own choice, lower level constructs can be used for that purpose.
Need help?
Start a discussion on GitHub if you’ve got questions or improvements. Open discussions →