Automate deployment of Pelican Website to GitHub Pages
Before moving forward, let's just accept that all of us use GitHub as our code repository. There are good reasons why? From free public and private repositories, to free GitHub Actions and free static hosting in form of GitHub Pages.
What is GitHub Pages
If you haven't heard of GitHub Pages, it is a service from GitHub that allows you to host a website or documentation directly from your repository. All you need to do is edit your changes, and push to the repository and your changes will be live in seconds.
This becomes specially relevant with the increased adoption of Jamstack tools such as Pelican, Hugo, etc.
But here's the problem. GitHub pages works only on three folders
- main branch: The root of default main branch. Inconvenient since root folder will typically contain all of your code
- main/docs directory: The doc folder in main branch. This could be possible but this would mean generating the content manually and then pushing it to repository
- gh-pages branch: This could work but you need to copy only the output folder so that the full code is not copied
How to automate deployment
Here's what we will do, we will setup a VSCode devcontainer, install Pelican, and then publish the website to GitHub pages.
Step 1: Prepare the development environment
To begin, create a new repository on GitHub.
Then fire up VSCode, press Shift + Ctrl + P to bring up the command pallette, then type "Clone repository in Container Volume" to clone your repository in a container.
This will ask if you want to clone a repository from GitHub, select the option, followed by the repository you have created. After that, choose the main as the branch you want to clone.
After that you will be asked to choose a container configuration, select "Show all definitions", search for Python 3, and choose Python 3.9 from the dropdowns, when asked, choose to install NodeJS as well.
We now have a devcontainer.
Step 2: Install Pelican and dependencies
In VSCode, bring up your terminal and then install Pelican by running
pip install "pelican[markdown]"
Step 3: Setup Pelican
In the terminal type the below to trigger Pelican setup
pelican-quickstart
This starts the interactive setup where you are asked a series of question, choose as per below
> Where do you want to create your new web site? [.]
> What will be the title of this web site? MyPelicanWebsite
> Who will be the author of this web site? Me
> What will be the default language of this web site? [en]
> Do you want to specify a URL prefix? e.g., https://example.com   (Y/n) N
> Do you want to enable article pagination? (Y/n) Y
> How many articles per page do you want? [10]
> What is your time zone? [Europe/Paris]
> Do you want to generate a tasks.py/Makefile to automate generation and publishing? (Y/n)
> Do you want to upload your website using FTP? (y/N)
> Do you want to upload your website using SSH? (y/N)
> Do you want to upload your website using Dropbox? (y/N)
> Do you want to upload your website using S3? (y/N)
> Do you want to upload your website using Rackspace Cloud Files? (y/N)
> Do you want to upload your website using GitHub Pages? (y/N)
Done. Your new project is available at /workspaces/pelican-test
We haven't used the default GitHub Pages setting because it only publishes the output but doesn't automate the process of building.
You content is stored in the "content" folder, create a file named my-first-post.md in that folder with the below contents
Title: My First automated blog post
Date: 2021-07-10
Category: Snippets
Tags: github, python, pelican
Author: Me
Summary: A guide to configuring automated Continuous Deployment (CD) of static site \
generated by Pelican SSG from GitHub repository to GitHub pages using GitHub Actions

## This is my first blog post
And it looks wonderful!
Step 4: Test your Pelican website
To generate and serve your Pelican Website, run the below command
make devserver
This will build your blog in the output folder and start serving it on localhost:8000.
Start your browser and open the URL localhost:8000, and congrats 🎉🙌🏽🎇🎊🎈 you blog is up and running.

Configuring GitHub action for automated deployment
Create a file at the path .github/workflows/pelican.yml, with the following contents
name: Deploy

on:
  # Trigger the workflow on push on main branch,
  push:
    branches:
      - main

jobs:
  build:
    runs-on: ubuntu-latest
    steps:
    - uses: actions/checkout@v2
    - uses: justgoodin/pelican-to-github-pages@v1.0.2
      env:
        GITHUB_TOKEN: ${{secrets.GITHUB_TOKEN}}
        GH_PAGES_CNAME: ${{secrets.DOMAIN_CNAME}}
This action uses a GitHub Marketplace action published by me justgoodin/pelican-to-github-pages@v1.0.1 to build your website and copy the output folder contents to gh-pages branch.
Configuring Secrets
GITHUB_TOKEN is a default action and you don't need to configure it, however, you will need to configure the DOMAIN_CNAME secret if you want to use a custom domain. In this example we will not configure since we will use a github.io subdomain.
You can read more about the action at the GitHub Marketplace.
Deploying the Pelican
Go back to your VSCode terminal and run the below commands to push your repository to GitHub.
pip freeze > requirements.txt
git add .
git commit -m "My first Pelican blog"
git push
This will automatically create and run an action in GitHub > Actions tab of you repository
If everything went alright, you should see
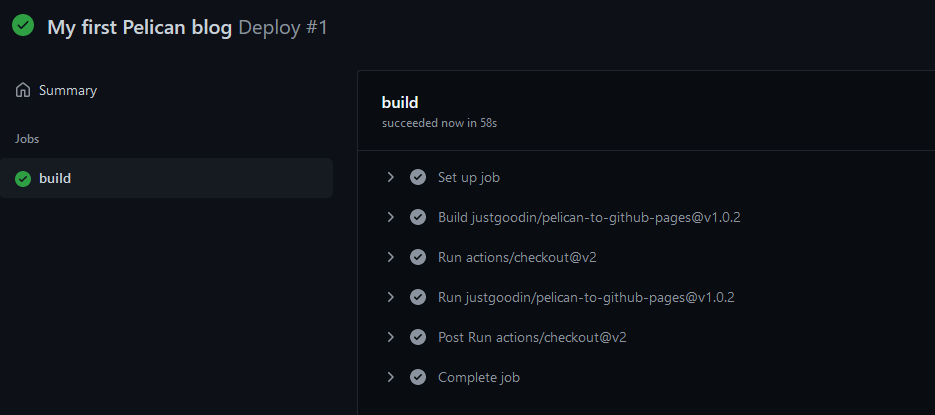
Publishing the website for the first and only time
Go to your repository on GitHub, on the repository navigation go to "Settings", then scroll down and click on Pages, under Source, choose gh-pages branch, and click on save. Shown below
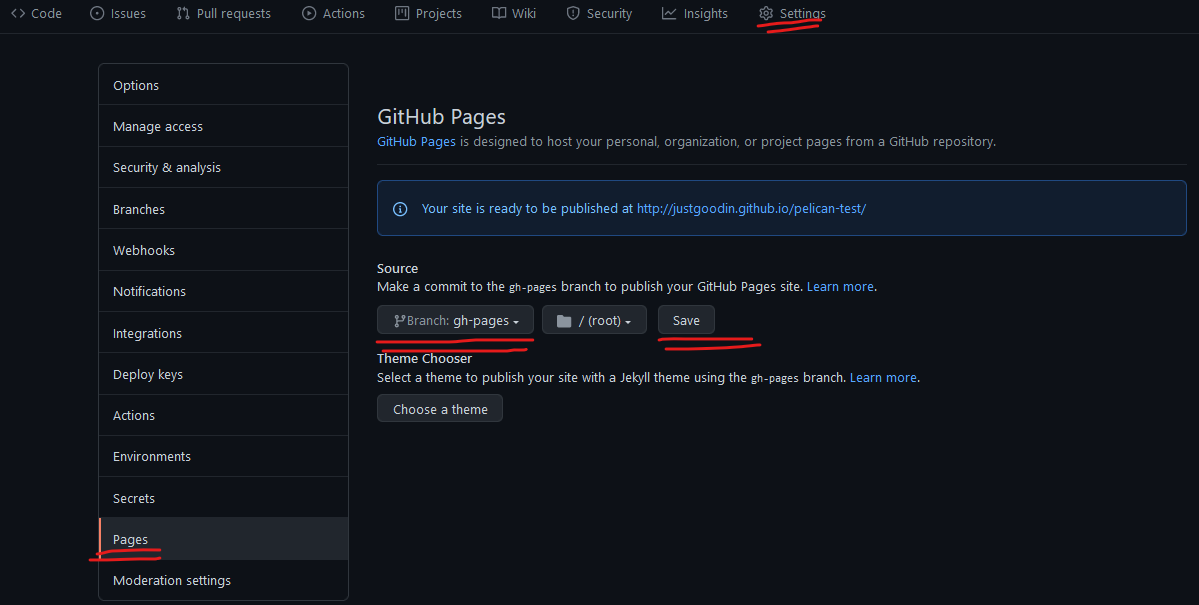
If you go to the URL listed above source, your website is published. Hurray!! 👏🏽🥳